Introduction
I this tutorial, we will give an overview of the relevant functions of SemwidgED. We will create a website for displaying information about persons (in our case Albert Einstein and Stephen Hawking) containing several widgets. We will generate a template from this widgets that can be re-used and connect it to a regular drop-down-list that can change the language of the widgets on-the-fly. The final product of this tutorial can be seen at the end as exported HTML versions as well as editable content within the editor.
Table of Content
- Configuring SemwidgJS
- Creating a Text widget
- Creating an Image widget
- Creating a Text widget with mixed content
- Switching widget types
- Creating a Map widget with multiple attributes
- Converting multiple widgets into a Template
- Creating a Template Instance
- Creating an additional resource element
- Creating a second Template Instance
- Creating a Mapping
- Creating a select box and binding it to a mapping
- Exporting the website
- Editor example
- Exported example
1. Configuring SemwidgJS
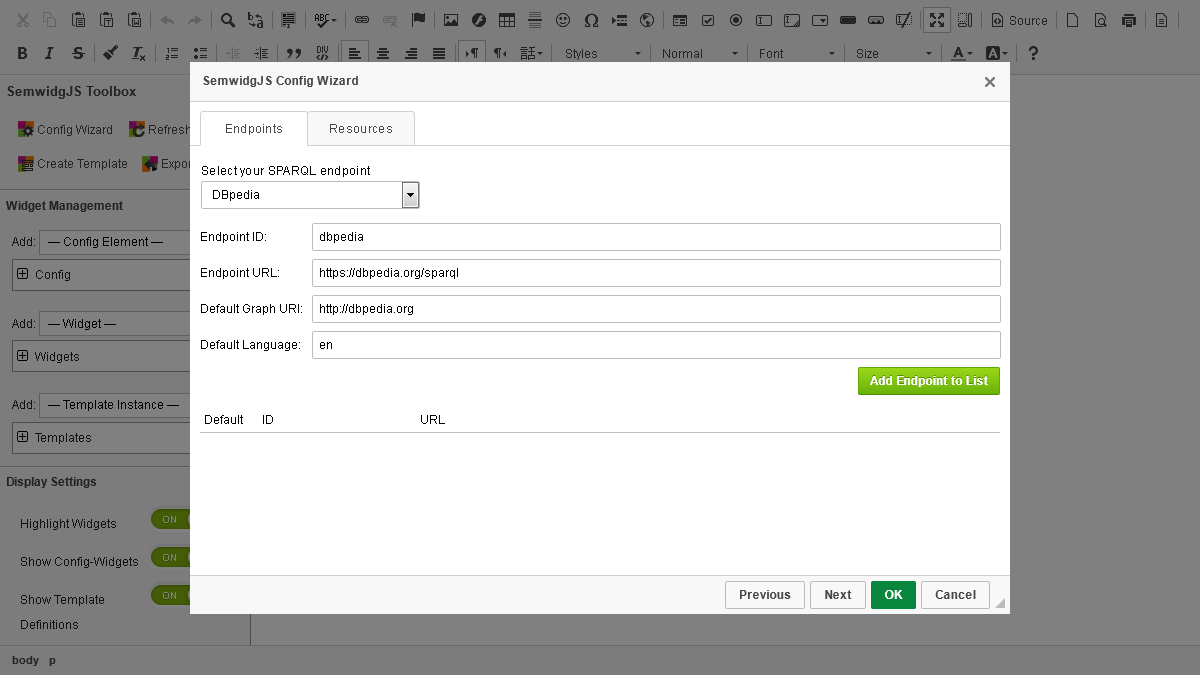
At the beginning, our website is empty and we have to tell SemwidgJS which SPARQL endpoint and which resources should be used for the website. Click the button Config Wizard in the upper left corner of the SemwidgJS Toolbox.
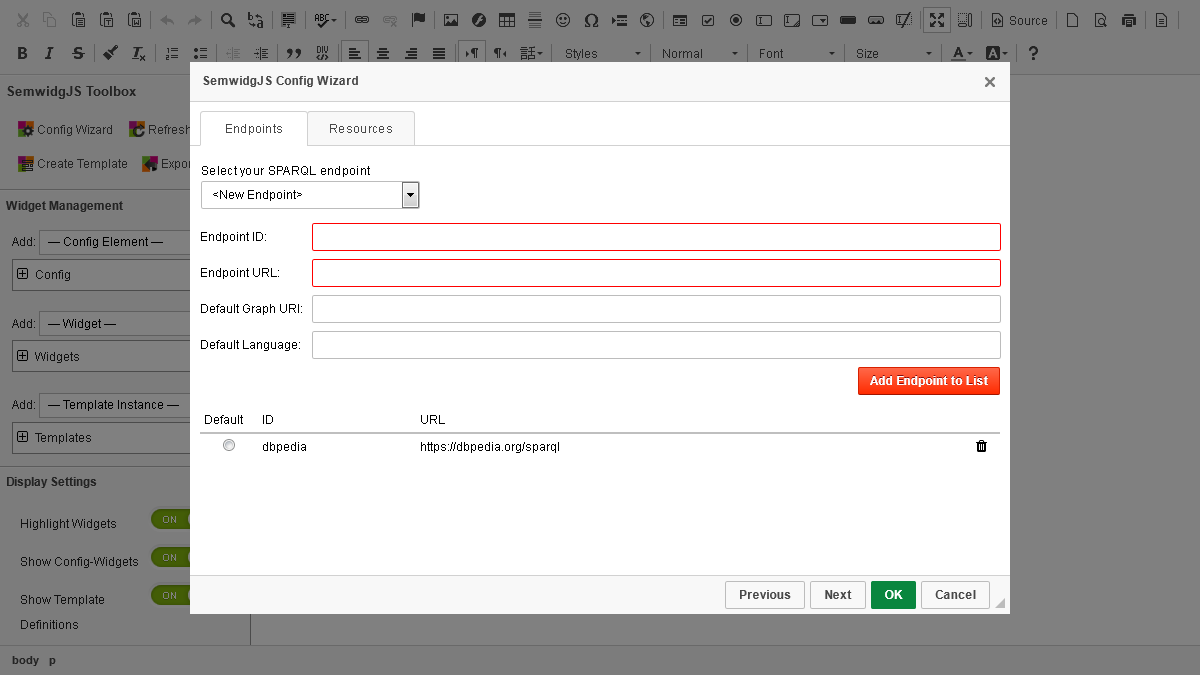
In the Config Wizard, we can select a predefined SPARQL endpoint from the list or we can define the required data by ourselves. Select the DBpedia endpoint and click the button Add Endpoint to List. We can add multiple endpoint configurations to our website, if we want to display information from different endpoints simultaneously.
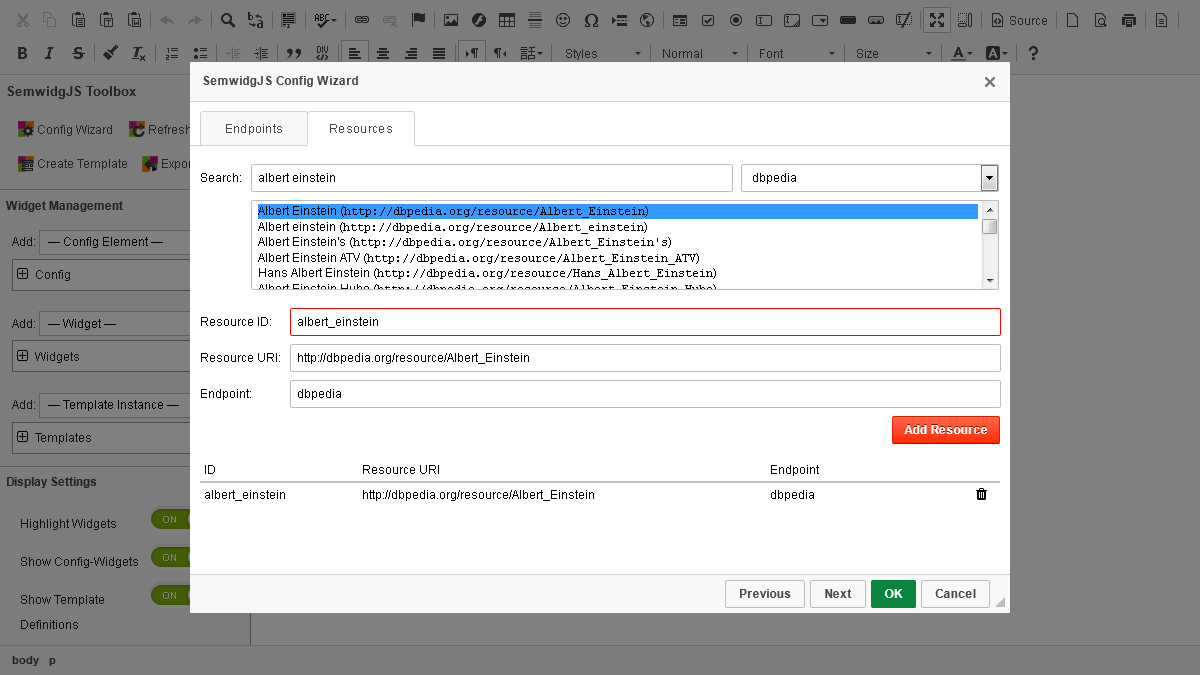
Next, we will create a named resource that will be the starting point used in our widgets. Switch to the Resources tab. DBpedia should be selected as endpoint (if not, go back to the Endpoints tab and make sure it is in the list of enpoints on the bottom of the dialog window). Enter Albert Einstein into the search field and wait for the results. Select the resource with the URI http://dbpedia.org/resource/Albert_Einstein and click the Add Resource button.
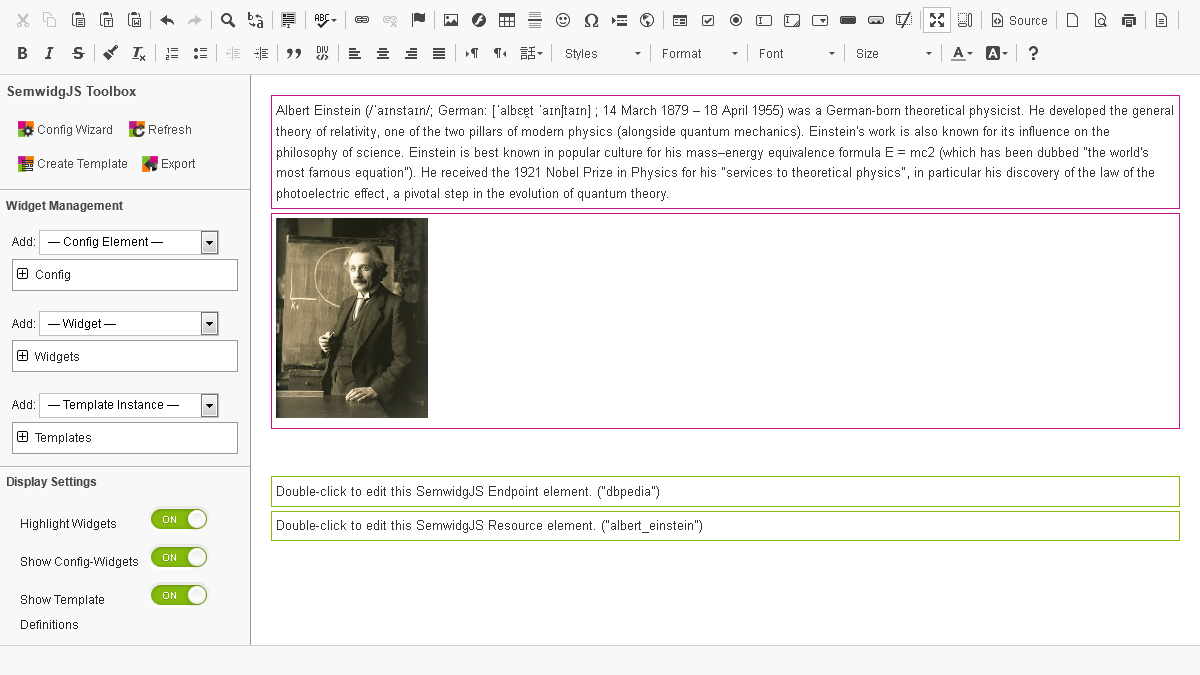
Click the OK button to save the configuration. Two elements with a green border should now be visible in the HTML area, representing the two config elements you created in the last steps.
2. Creating a Text widget
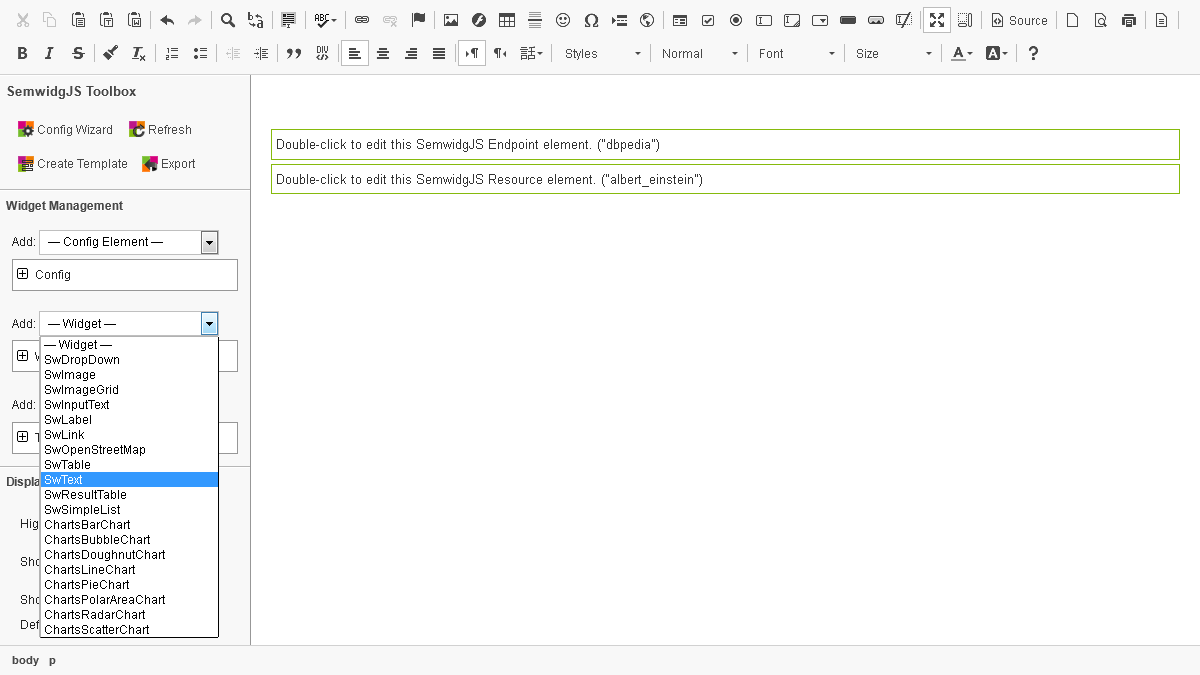
We will now create our first Text widget. This widget will display the English text that is stored as rdfs:comment for Albert Einstein in DBpedia. In the HTML area of the editor, position the cursor in an empty line/paragraph. If there is no empty line, you can create a new one below a widget or config element by clicking the red Insert paragraph here button that appears when hovering over these elements. Afterwards, select SwText from the Add: Widget dropdown menu on the left side.
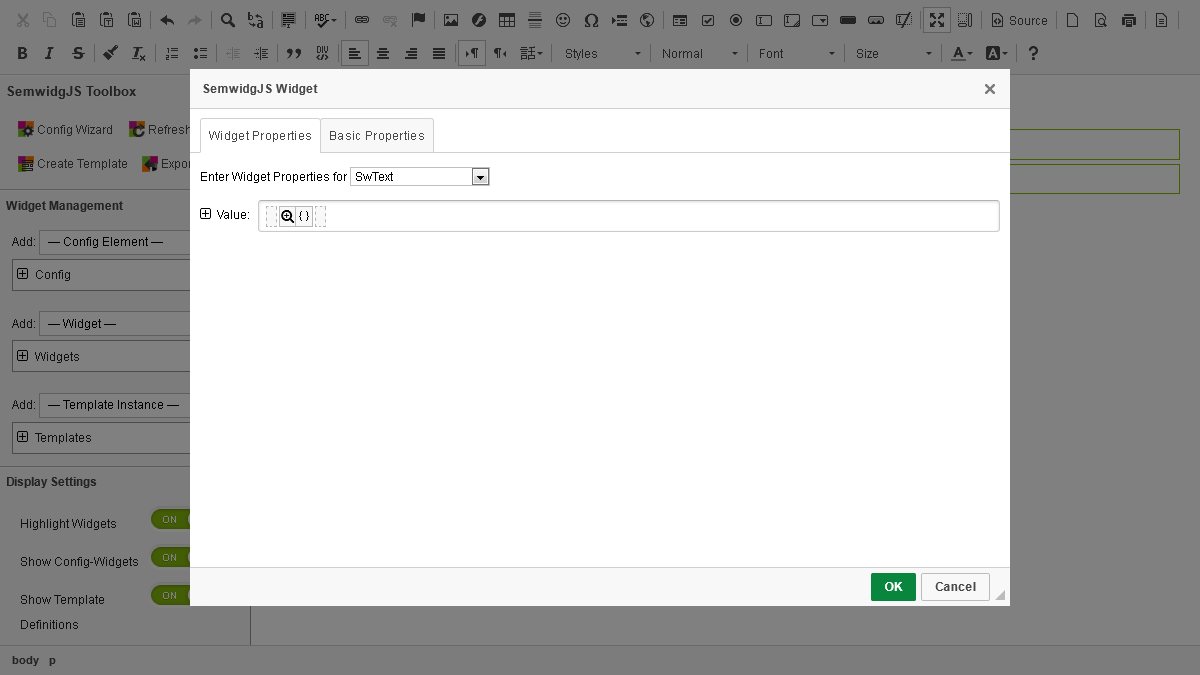
We can now define the properties for our widget. The property Value defines the content to be displayed by the widget. Since we want to display the rdfs:comment text of Albert Einstein, we need to define a query that requests this text. Click on the Value text input field and select Start a new SemwidgQL query. A magnifying glass icon in front of two braces should now have been appeared at the cursor position.
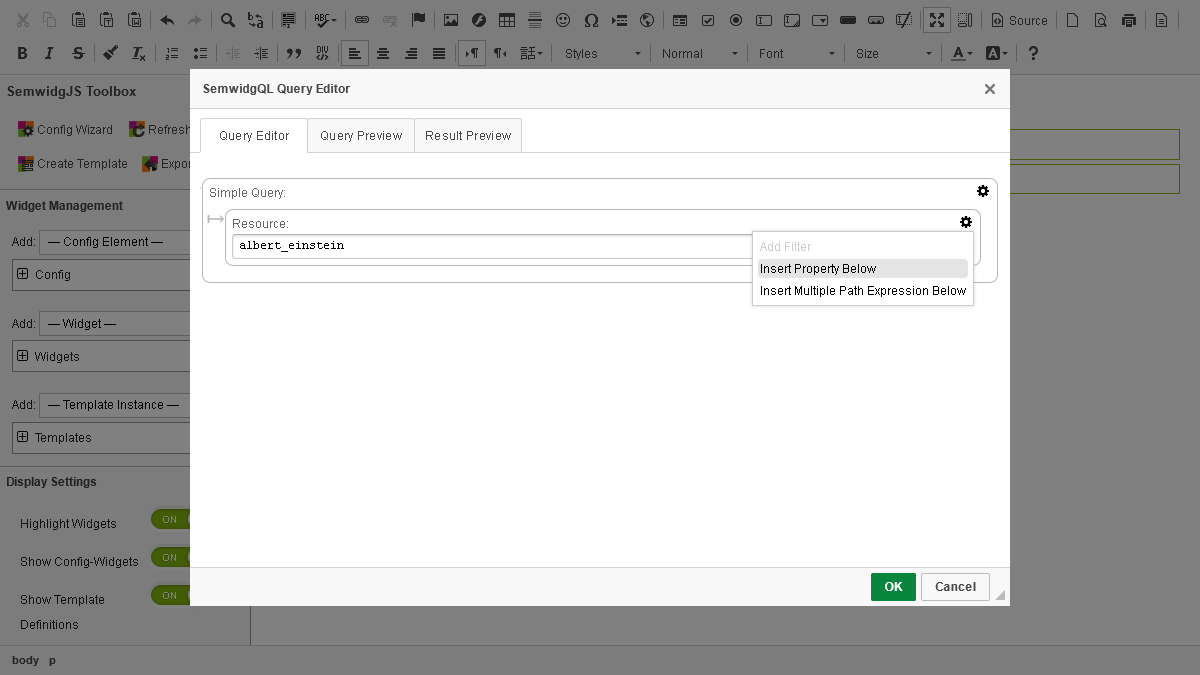
Click on the magnifying glass icon to open the SemwidgQL query editor. In this editor, we can create our SemwidgQL query step by step. Each component of the query is represented within a hierachical structure of nested blocks. The root element of this structure is a Simple Query with a Resource as its only child element. Click on the Resource text input field and select albert_einstein.

To append a property to the resource click on the gear icon on the right side that belongs to the resouce and select Insert Property Below. A new box will appear below the Resource box.
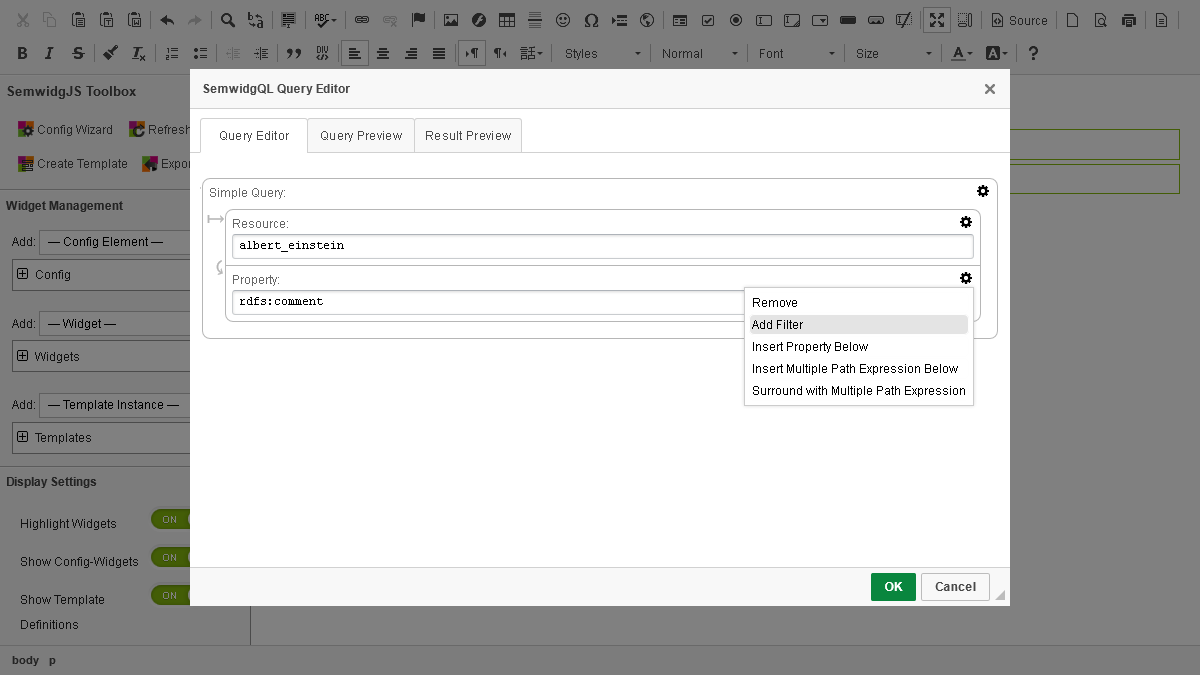
By selecting the new text input field, the editor will request all possible outgoing and incomming properties for Albert Einstein (outgoing: albert_einstein ?propery ?x, incomming: ?y ?property albert_einstein). They are listed in the autosuggest list below the text input field. Each entry consist of four parts: 1) an arrow that indicates if the property is an outgoing or incomming property, 2) the label of the property, 3) the URI of this property, and 4) a sample value for this property. Start typing the name of the desired property (comment). While typing, the autosuggest list is re-ordered and the item for rdfs:comment should move to the top. Use the arrow bottons on your keybord to select this item and press enter. Alternatively, you can select the element using the mouse.

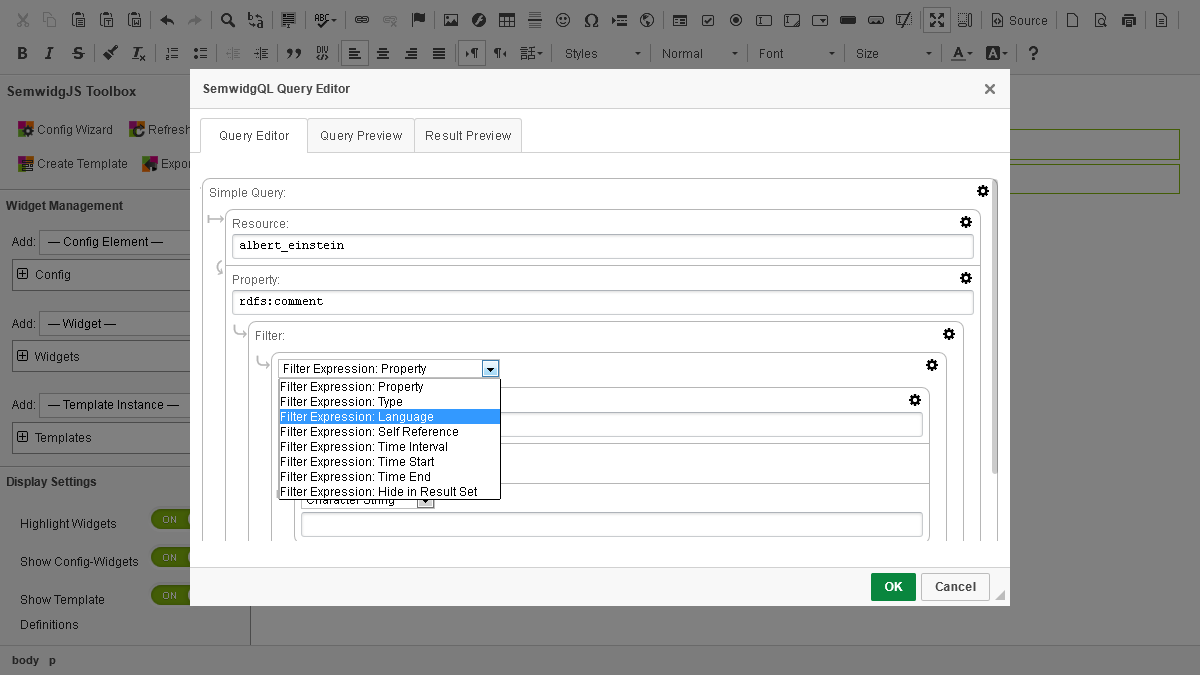
As already indicated by the sample value in the autosuggest list, the texts are available in different languages. We will add a language filter to only query the English comment. Click on the gear icon and select Add Filter.
Change the filter type to Filter Expression: Language. The default language filter already is English, so you can click the OK button on the bottom of the editor window to complete the query creation process. The content of the Value text input filed of the widget should now be {albert_einstein.rdfs:comment(@lang = 'en')}. Again, click the OK button to complete the widget creation process.
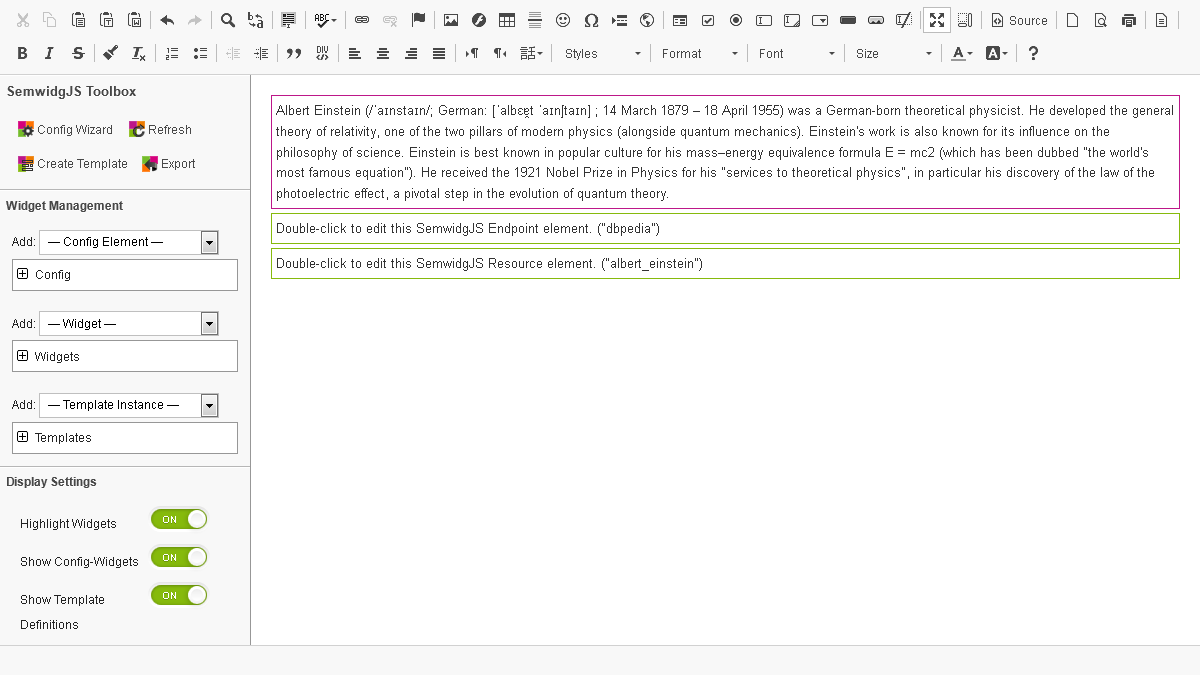
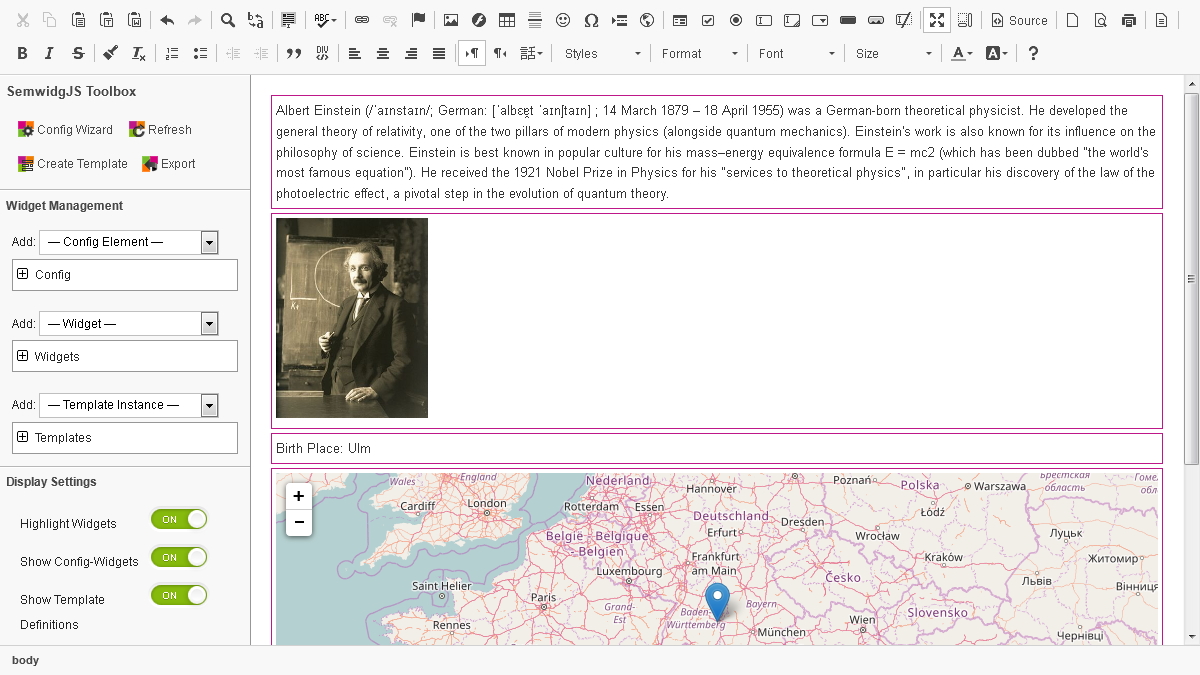
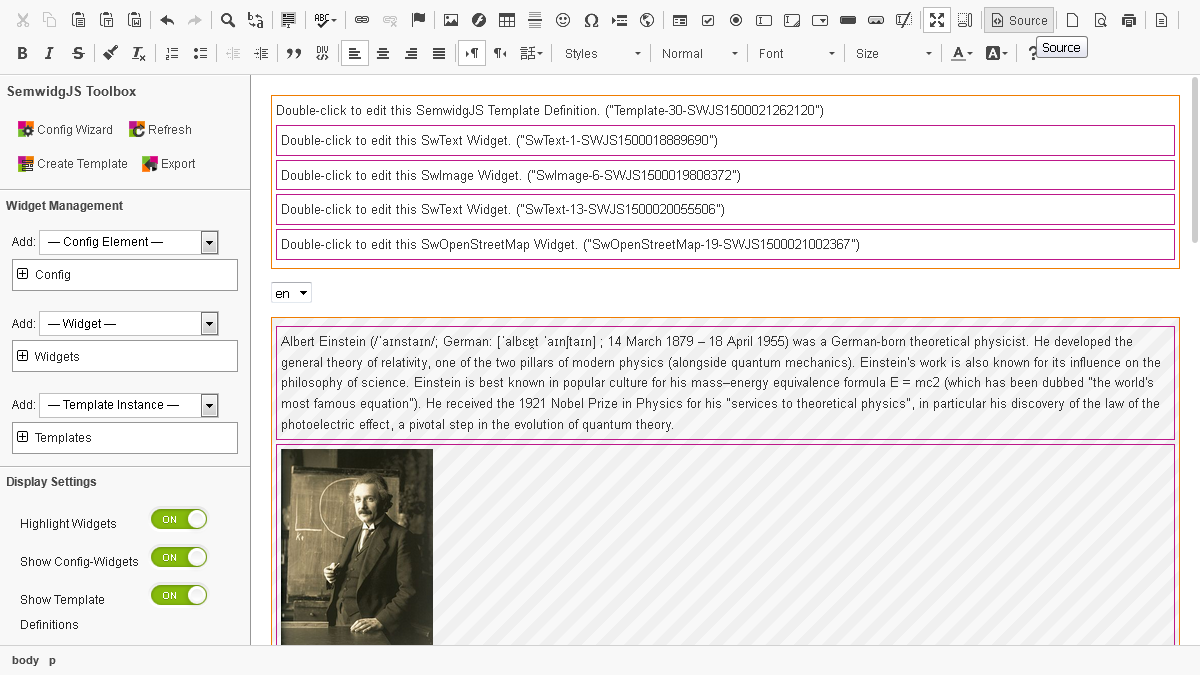
The widget is now completed and is displaying the comment text of Albert Einstein. Widgets in the HTML area are surrounded by a purple border. You can double-click on a widget to bring back the configuration menu at any time.
3. Creating an Image widget
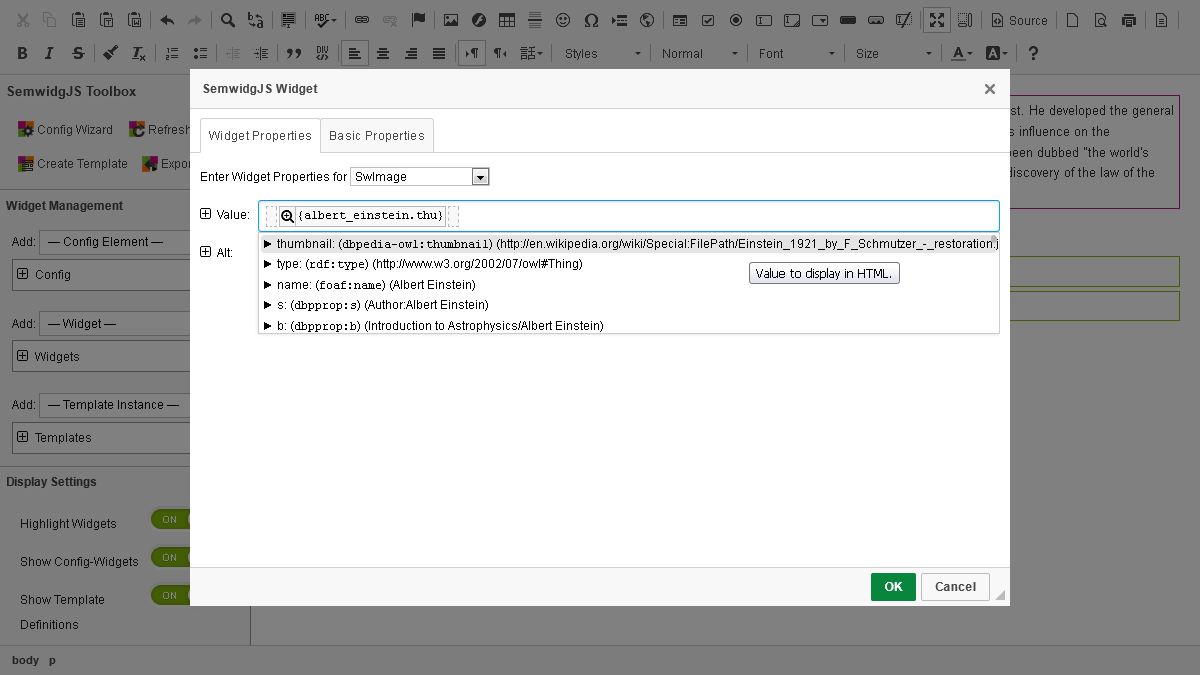
Next, we will create an Image widget. But this time, we will directly type our query and will make use of some additinal widget properties. Select an empty line in the HTML area and create a new SwImage widget by using the Add: Widget dropdown menu on the left side. Click on the Value text input field and select Start a new SemwidgQL query. Alternatively, you can directly type {. This will start a SemwidgQL query, but you must remember to close the query with }. When the cursor is placed between the braces, the autosuggest feature should present all configured resources and the additinal wildcard resource. Use the arrow buttons to selelct albert_einstein and press enter. Continue typing the query (.thu…) and select dbpedia-owl:thumbnail. This will return the URL of an image of Albert Einstein.
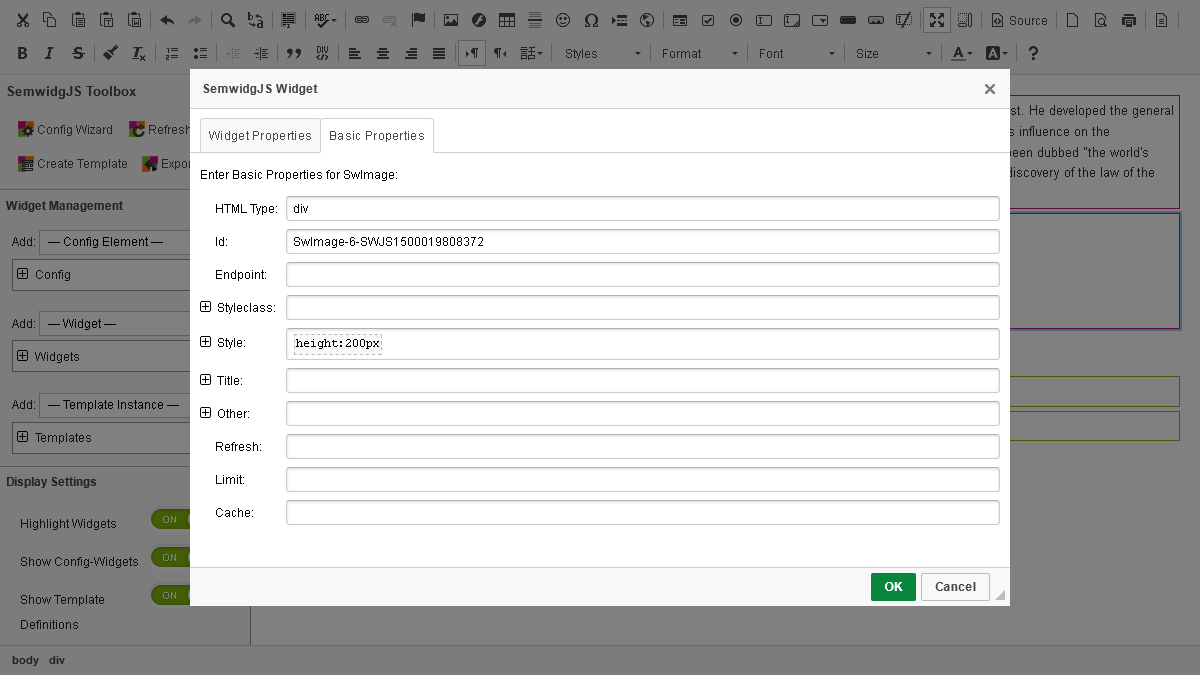
Since the images used in DBpedia/Wikipedia do not have a consistant size and we later want to reuse our widgets, we will set a fixed height. Switch to the Basic Properties tab. In the Style input field, we can enter arbitrary CSS rules that are later applied to the HTML content of the widget. Enter height:200px to set a fixed image height. Click the OK button to complete the widget creation process.
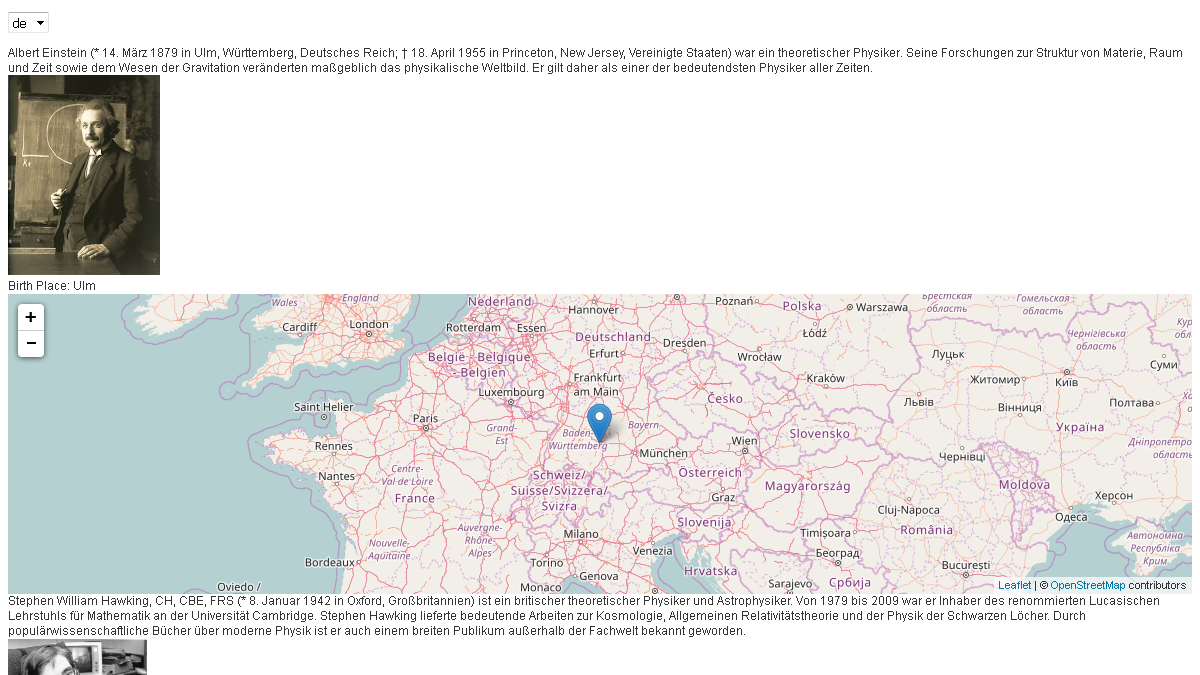
The widget is now completed and is displaying a picture of Albert Einstein. You can double-click on a widget to bring back the configuration menu at any time.
4. Creating a Text widget with mixed content
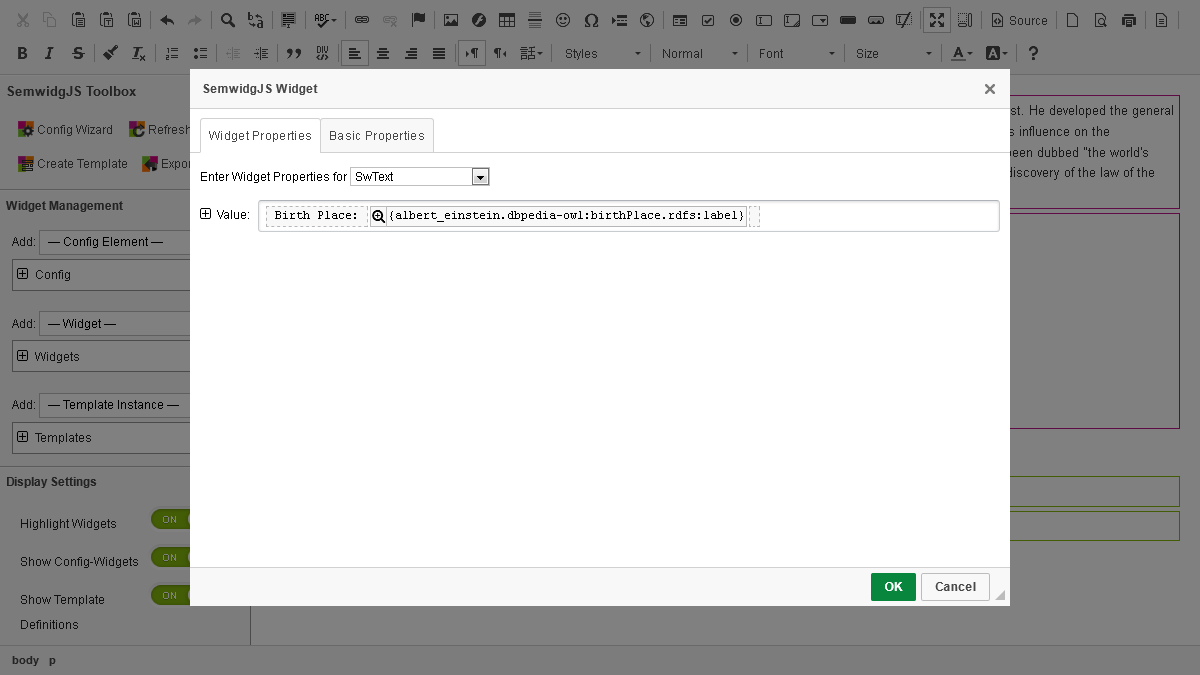
We will now create a Text widget that contains static text as well as text from a SPARQL endpoint to display the bithplace of Albert Einstein. Select an empty line in the HTML area and create a new SwText widget by using the Add: Widget dropdown menu on the left side. In the Value input field type Birth Place: followed by the query that retrieves the corresponding label of his birth place, enclosed in curly braces: {albert_einstein.dbpedia-owl:birthPlace.rdfs:label}. Click the OK button to complete the widget creation process.
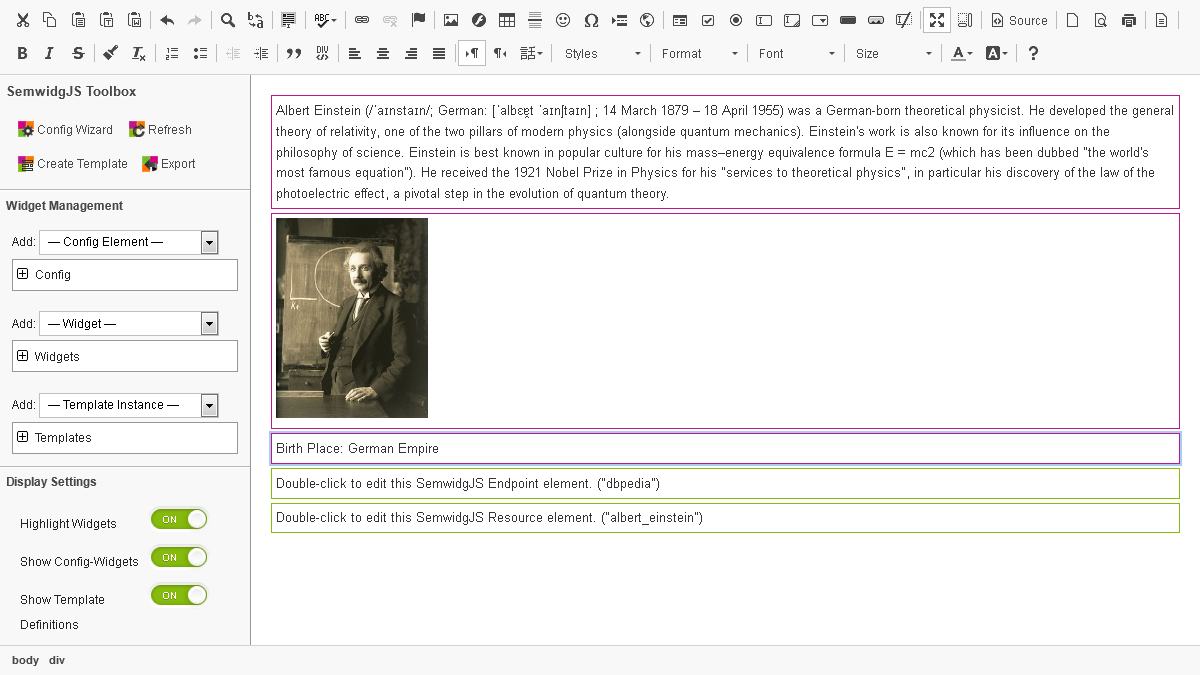
The widget should display the static text and the text from a SPARQL endpoint. But the birth place German Empire seems to be a little too generic. We will make this more precisely in the next step.
5. Switching widget types
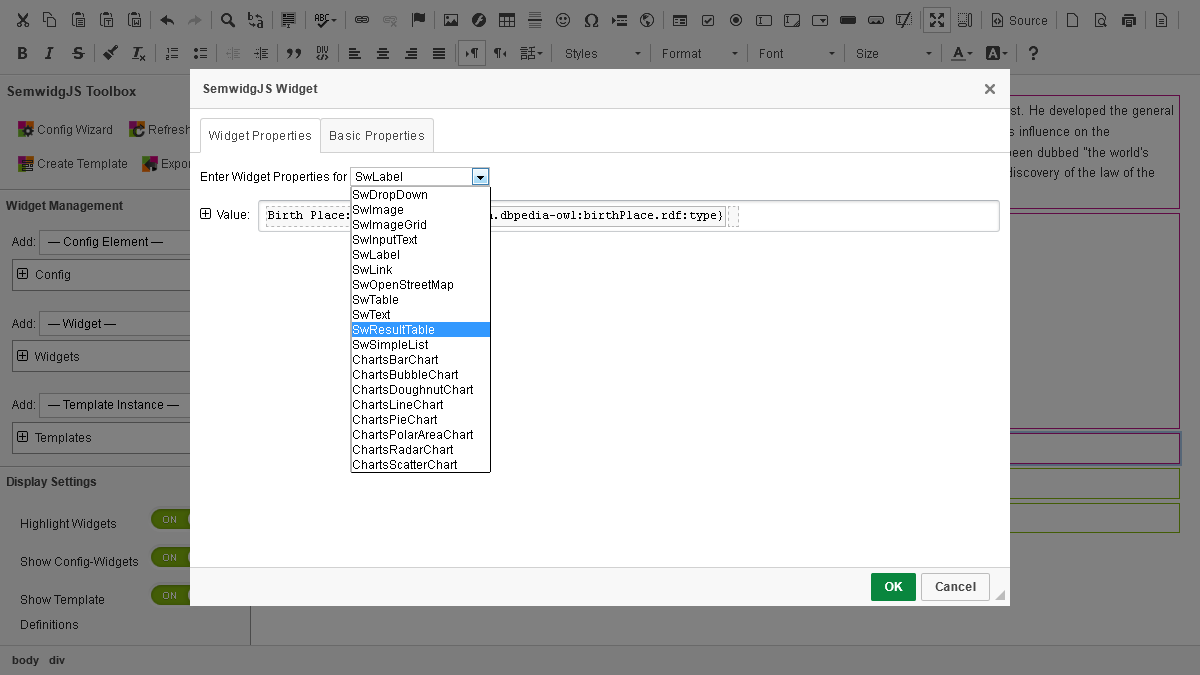
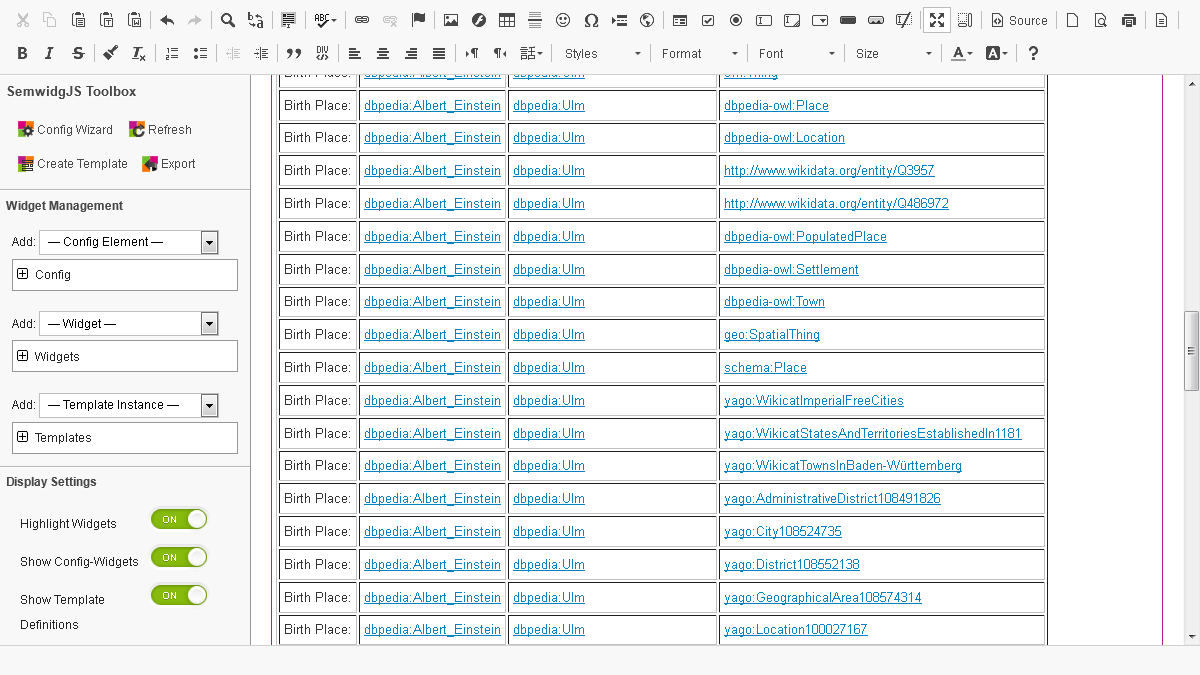
For most persons DBpedia contains a list of bith places of different precision. Mostly, containing the country, the town/city, and in some cases even a specific building (e.g for kings and queens born in a palace). The Text widget always displays the first result that is returned. Therefore, we need to filter the place by its rdf:type. To find the appropriate type, we will modify the SemwidgQL query a little bit and switch the widget to the Result Table widget. This widget displays all elements of the SPARQL result as a table. Double-click the birth place text widget and replace rdfs:label by rdf:type. Then switch the widget's type by selecting SwResultTable from the dropdown menu. Click the OK button.
The widget should now display a table containing the static text, the URI of the resource describing Albert Einstein, the URI of his birth places, and their type. We want to display the town/city he was born in, which is Ulm. Ulm has a long list of types and dbpedia-owl:Settlement seems to be precise but still generic enough to be reused with URIs of other persons.
Double-click the widget to open up the configuration dialog. Change back the widget type to SwText and re-replace rdf:type by rdfs:label. Also add a filter expression to the birth place that filters out everything but a dbpedia-owl:Settlement. The final query should be {albert_einstein.dbpedia-owl:birthPlace(@type = dbpedia-owl:Settlement).rdfs:label}. Click the OK button to complete the widget creation process.
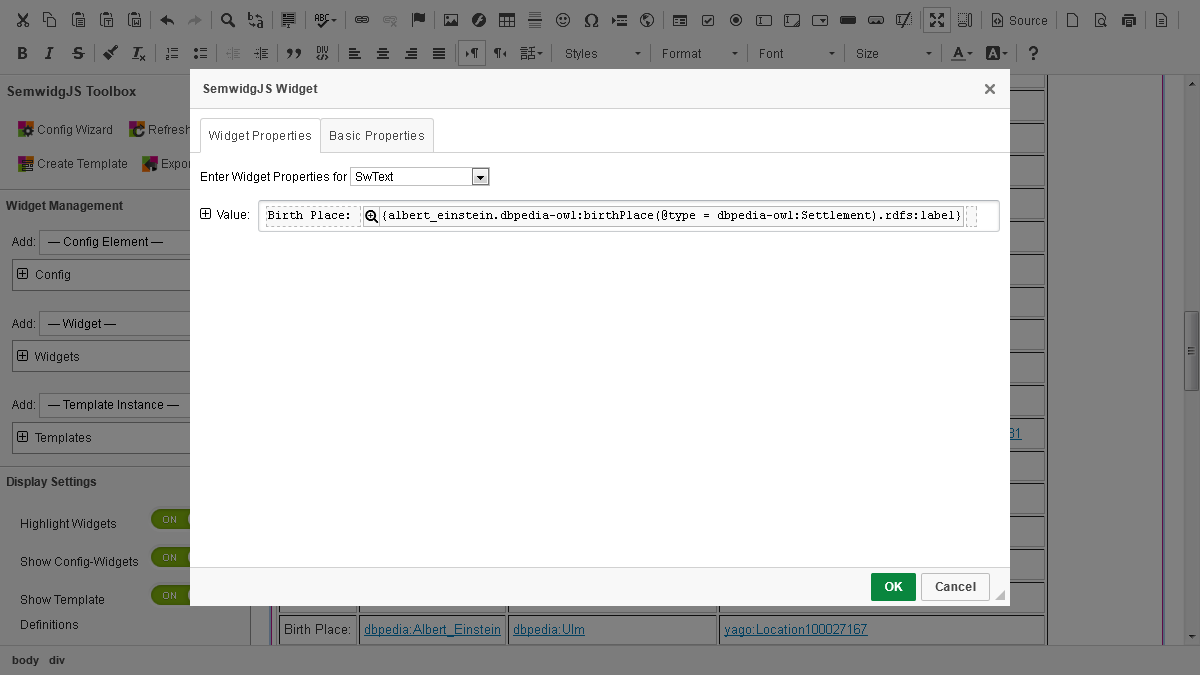
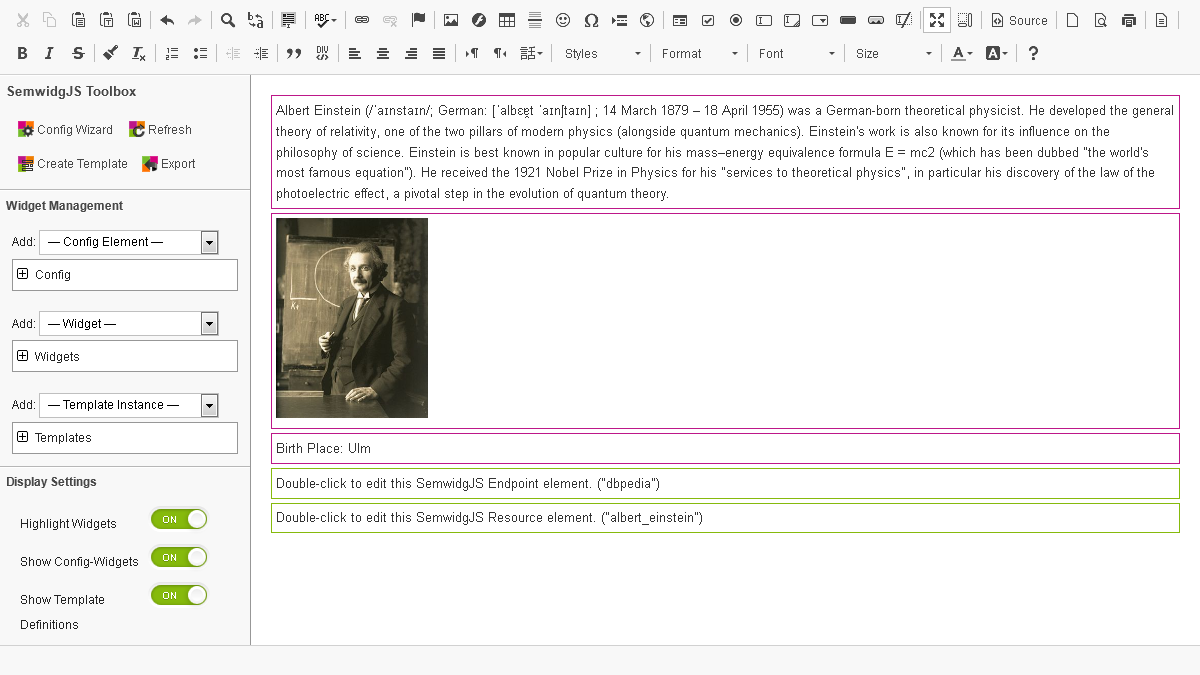
The text widget should now display the static text and the label of his city of birth that is retrieved from the SPARQL endpoint.
6. Creating a Map widget with multiple attributes
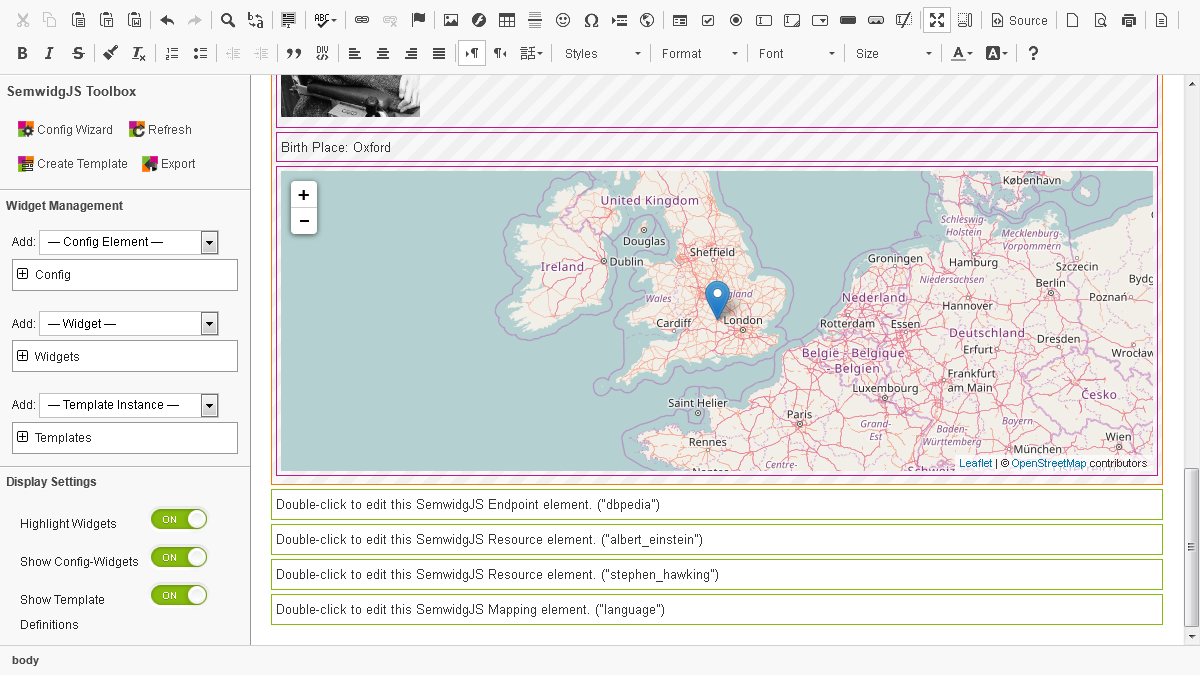
Some widgets like the Map widget require more than one value and therefore more than one query. We will now add a Map widget that displays the location of Albert Einsteins birth place. Select an empty line in the HTML area and create a new SwOpenStreetMap widget by using the Add: Widget dropdown menu on the left side. The widget requires a latitude and a longitude value. We can reuse the query from our last step that retrieves the label of Albert Einstein's birth place. Just replace rdfs:label by geo:lat and geo:long, respectively. Also enter a value for the zoom level of the map. 5 is a good value for this example. Click the OK button to complete the widget creation process.
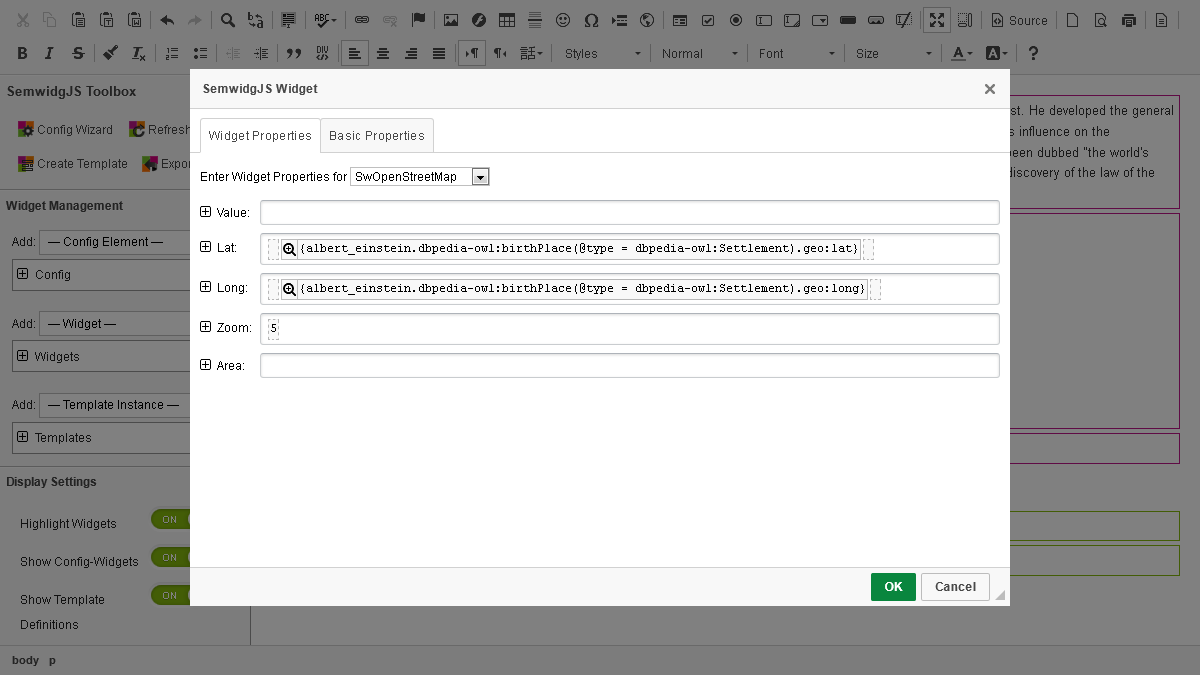
The widget should display a map with a marker at the location of Ulm.
7. Converting multiple widgets into a Template
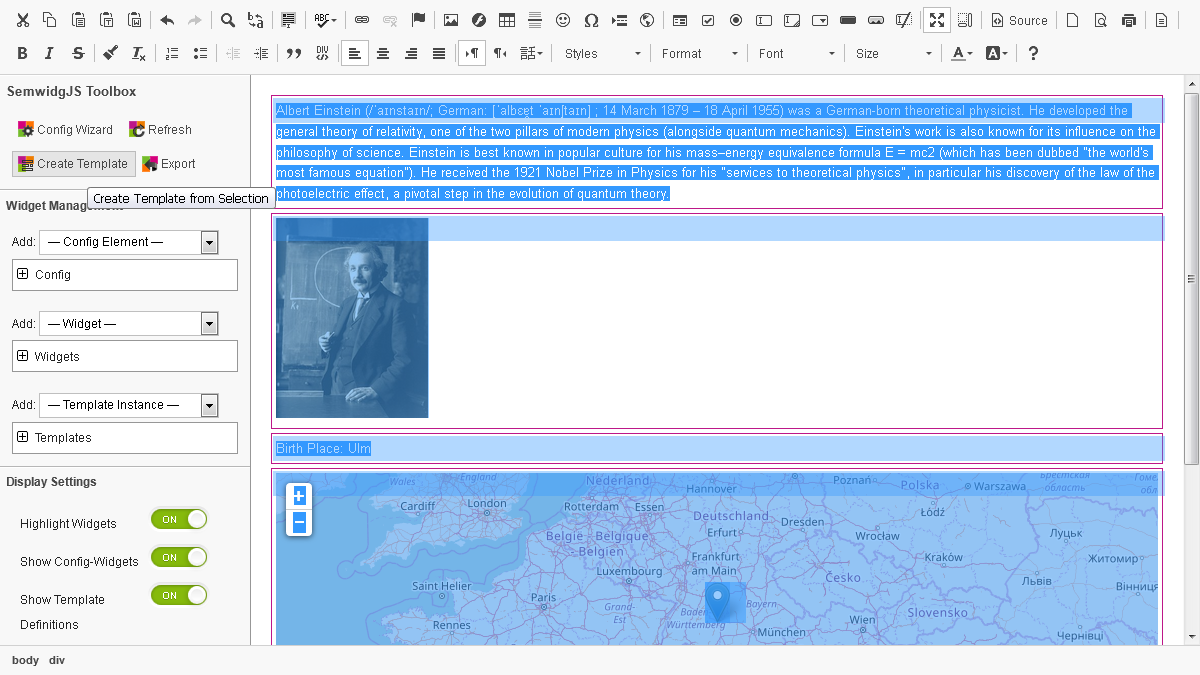
In the previous steps, we created several widgets, displaying information about Albert Einstein. Now, we want to reuse this widget composition for different persons. Therefore, we will convert this composition into a Template. During this process, we will replace the resource of Albert Einstein by a parameter variable that can be bound to any other resource URI. First, select all the widgets created in the last steps. You might need to create empty lines above and below the widget composition to do so. After that, you can select them with your mouse, as if they were normal text. Click into the upper empty line, hold down the left mouse button, and drag down to the end of the widget composition until all widgets are selected. Do not select the config element, as they should not be part of the template. With all widgets selected, click on the Create Template button in the SemwidgJS Toolbox on the left side.
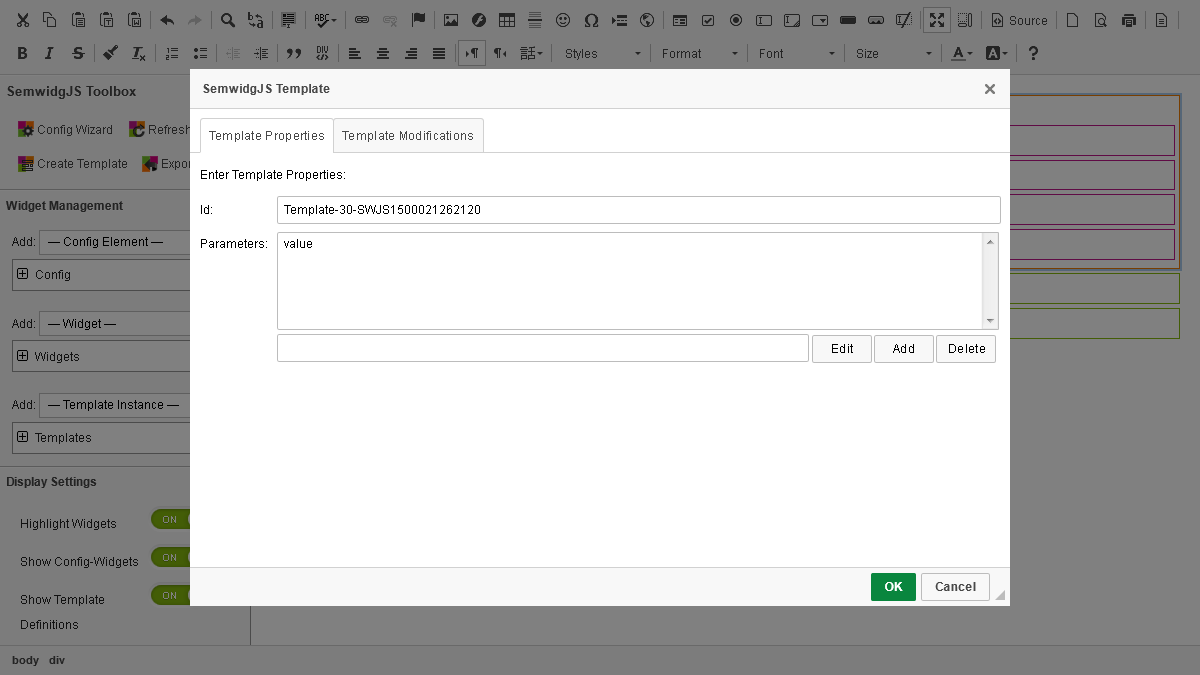
In the template creation dialog, a generic parameter value is already predefined.
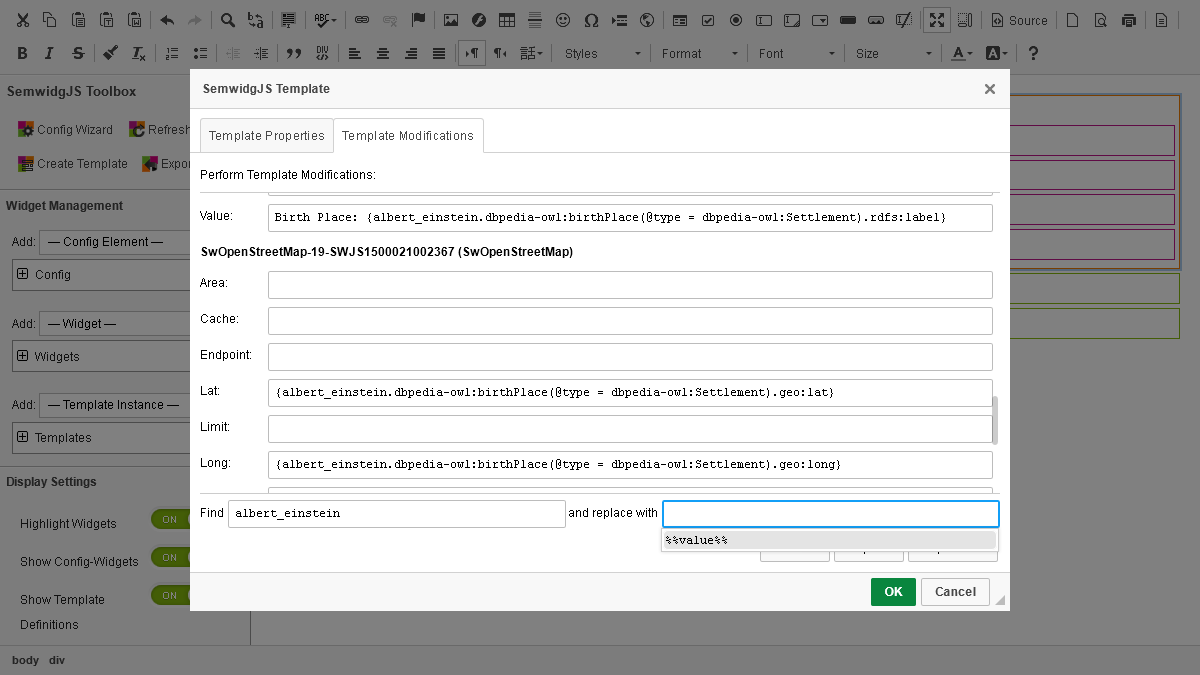
Switch to the Template Modifications tab. All widgets and their properties are listed here. Since we do not want to replace every occurence of albert_einstein by ourselves, we can use the find and replace feature of the editor. Click into the Find input field and select albert_einstein from the list of available resources. In the replace with input field, select %%value%% from the list of template parameters. Template parameters are always enclosed in double % signs.
Click the Replace All button to replace all occurences of albert_einstein by %%value%%. Click the OK button to complete the template creation process.

8. Creating a Template Instance
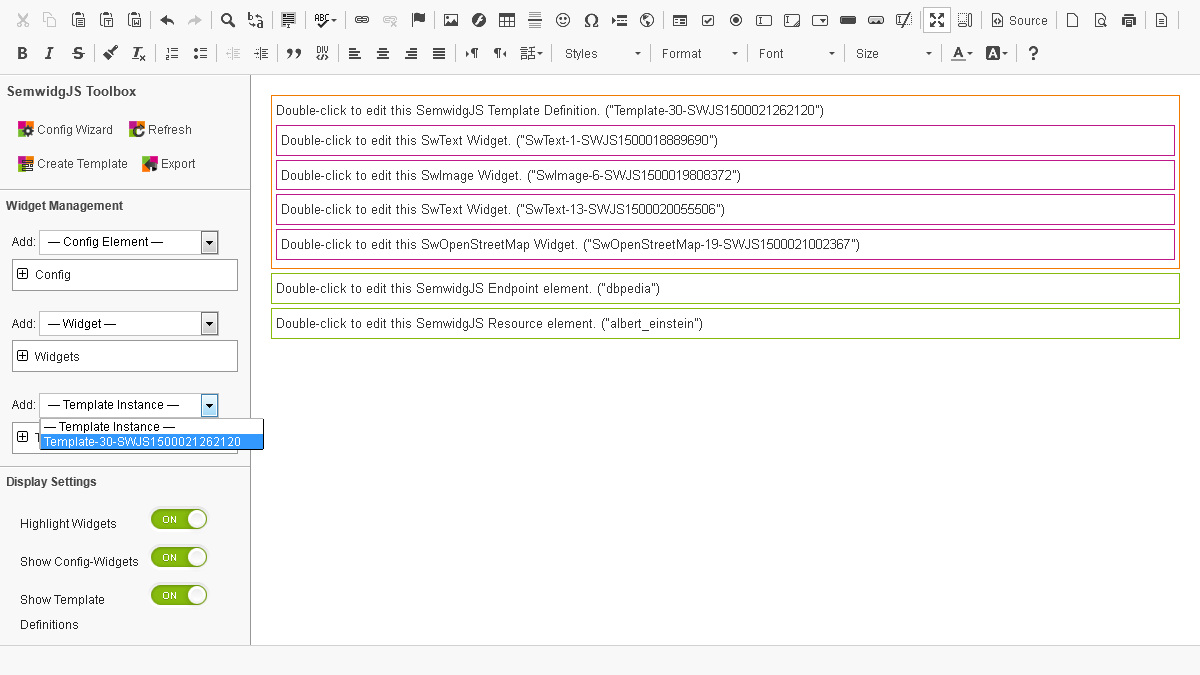
After converting our widget composition into a template, we have to create an instance of this template to bring back the content. In the HTML area, place the cursor in an empty line. From the Add: Template Instance drop-down menu on the left side, select the template created in the previous step.
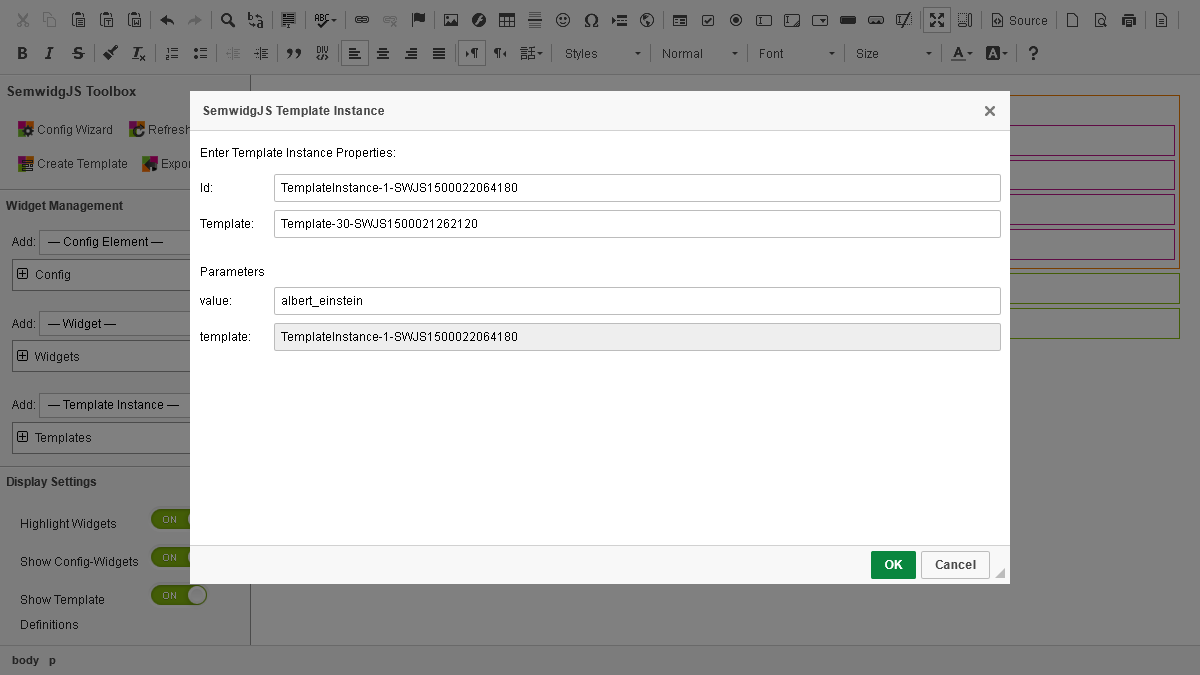
In the value: input field enter the id of the Albert Einstein resource (albert_einstein). Click OK to complete the template instance creation process.
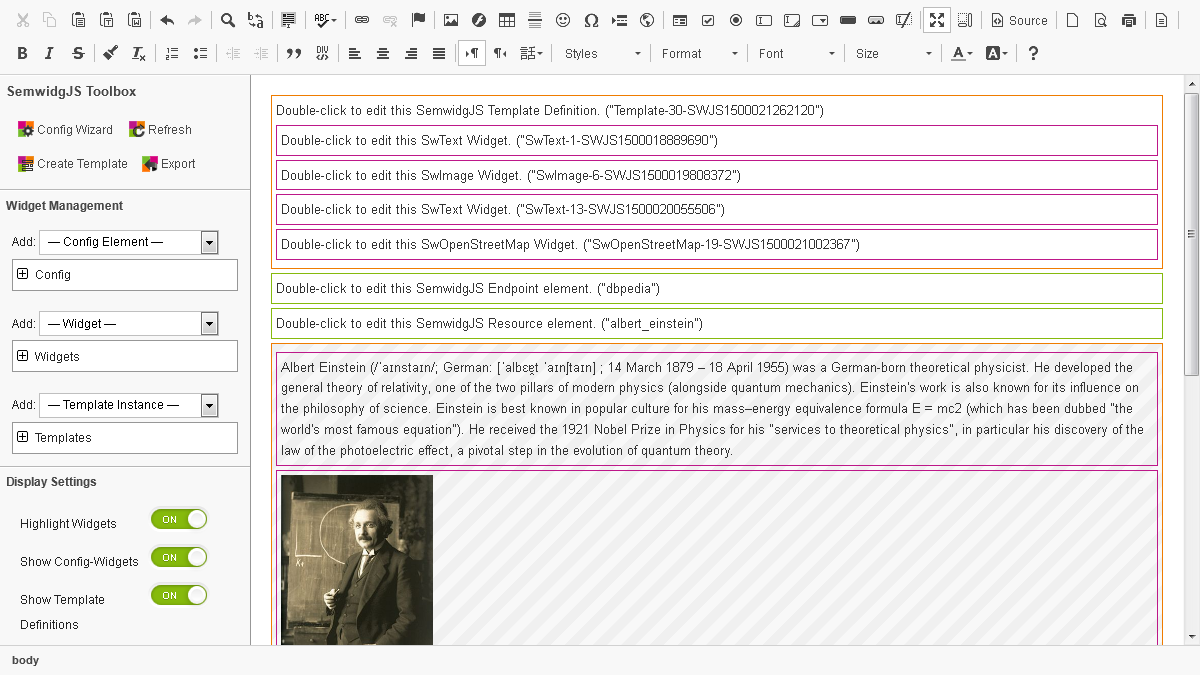
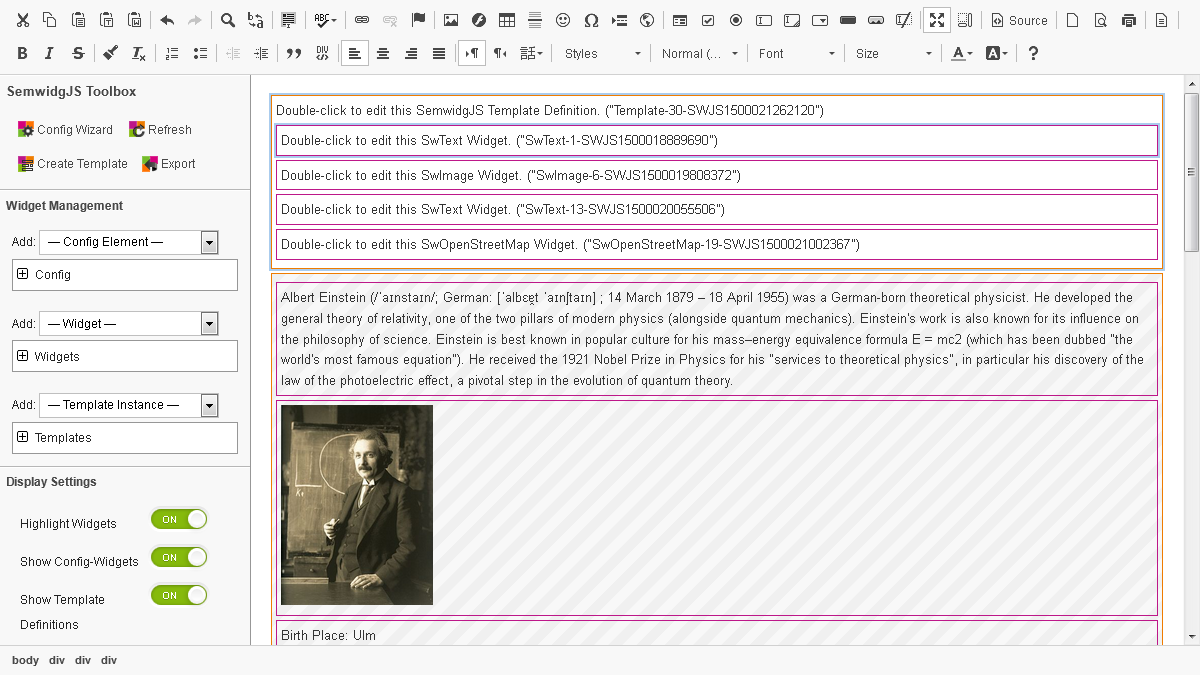
The template instance should look the same as the previous widget composition. But the background has a grey stripe pattern to indicate that it is a template instance.
9. Creating an additional resource element
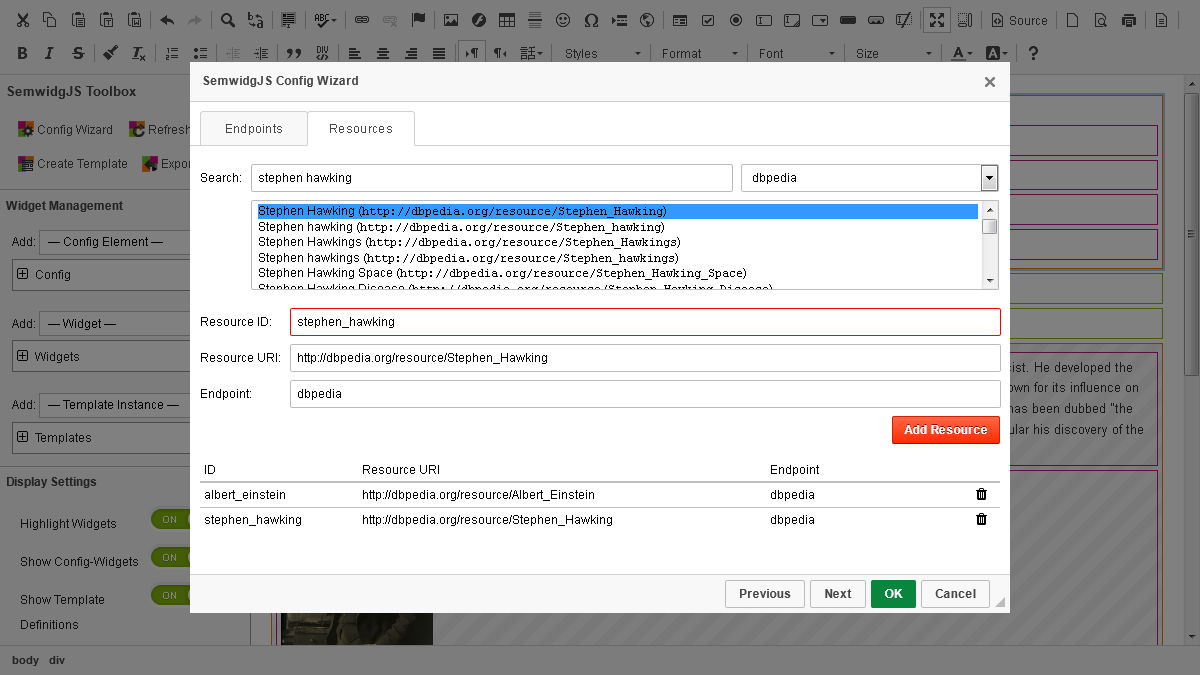
We will later create another template instance displaying information about Stephen Hawking. To prepare for this, we have to add another resource element containing the corresponding URI of him. Open up again the Config Wizard from the SemwidgJS Toolbox in the upper left corner and switch to the Resources tab. Seach for Stephen Hawking and add the corresponding resource. Click OK to complete the resource creation process.
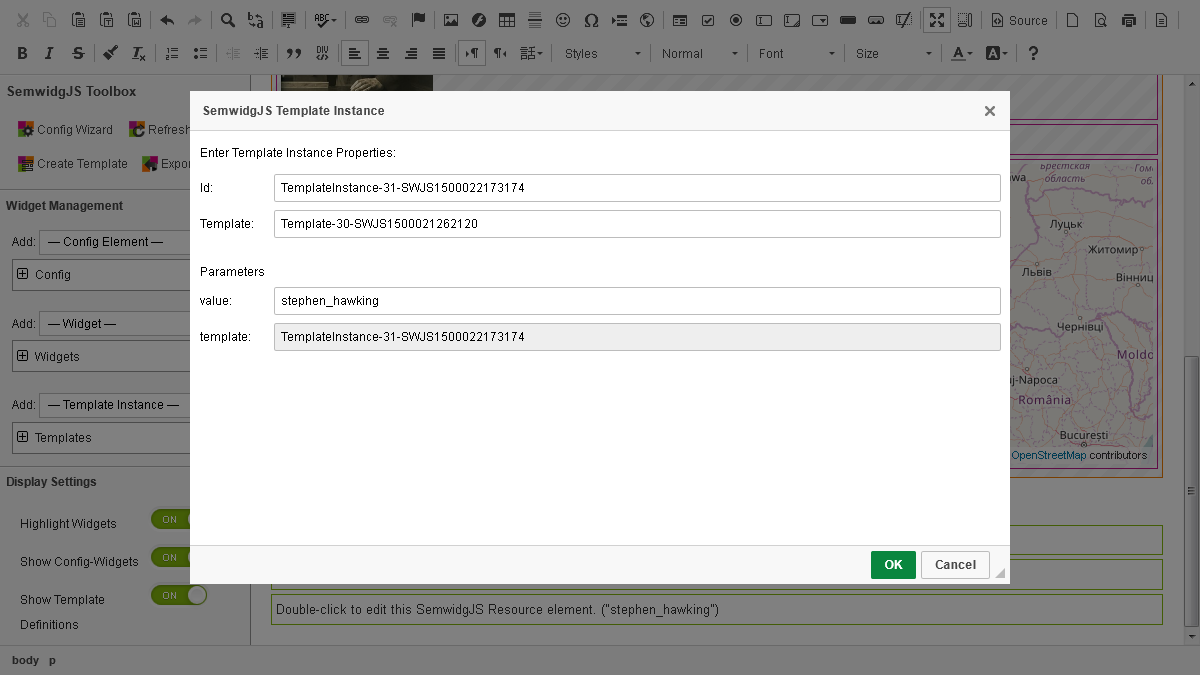
10. Creating a second Template Instance
We will now create a second template instance, displaying information about Stephen Hawking. In the HTML area, place the cursor in an empty line. From the Add: Template Instance drop-down menu on the left side, select the template created before. In the value: input field enter the id of the Stephen Hawking resource (stephen_hawking). Click OK to complete the template instance creation process.
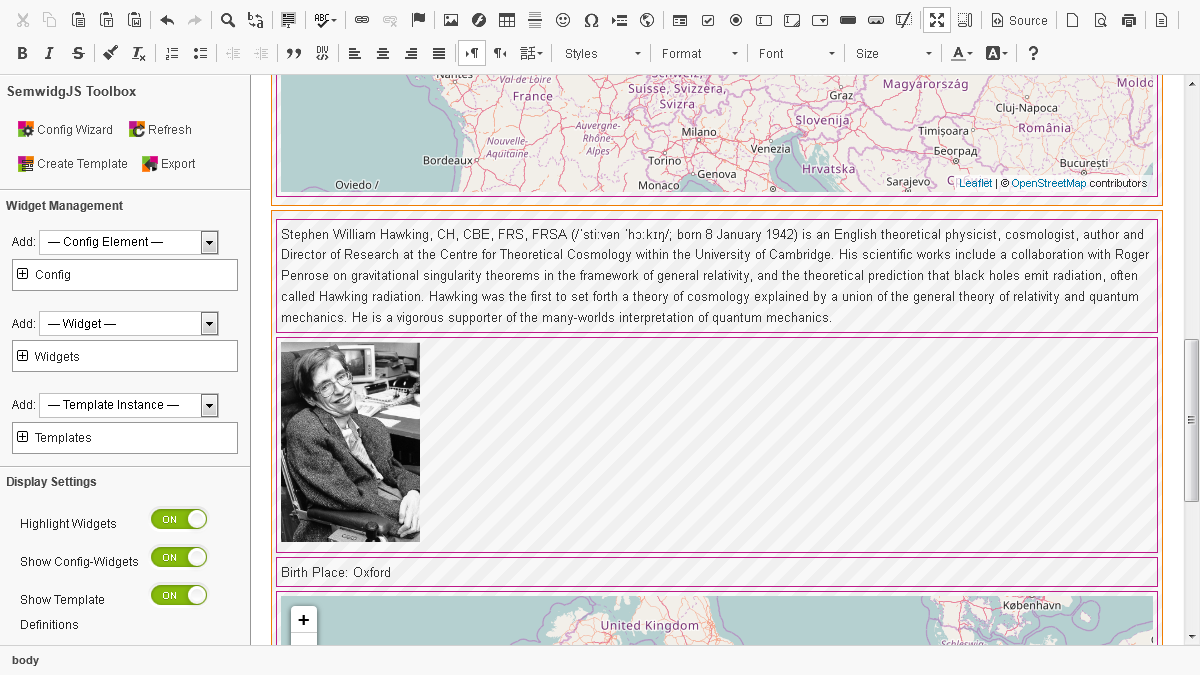
In addition to the Albert Einstein template instance, we now have a second template instance for Stephen Hawking. The template should be usable with almost any person that DBpedia has information about.
11. Creating a Mapping
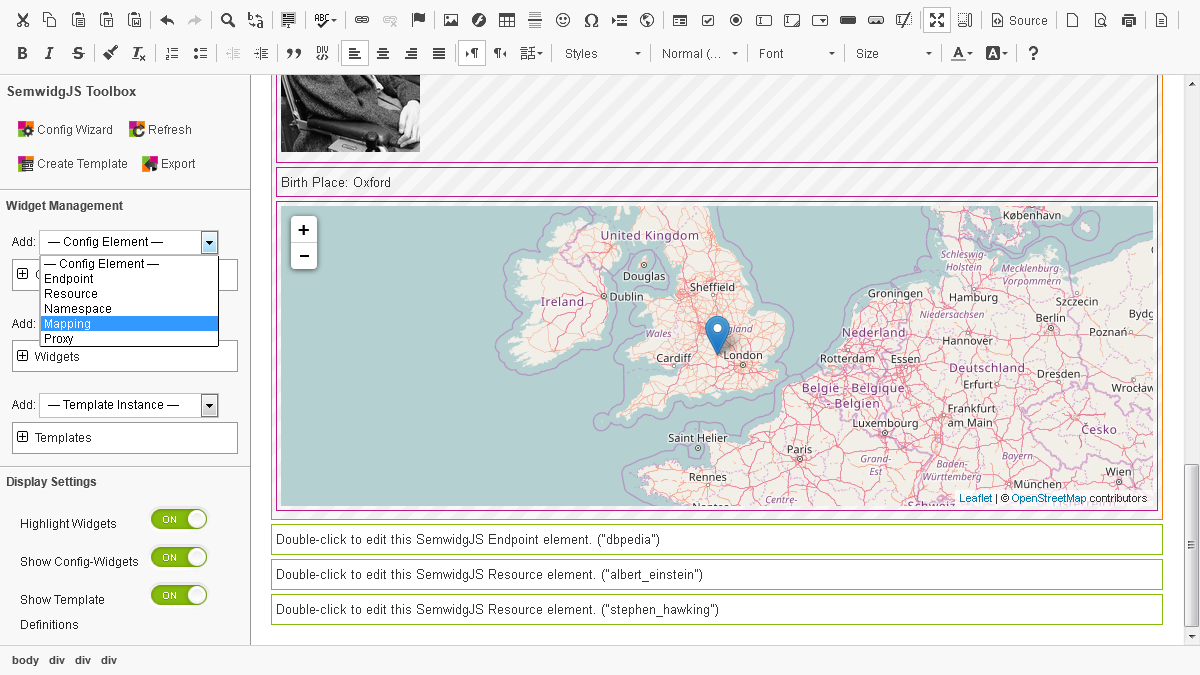
In a previous step we added a language filter to the comment text of Albert Einstein to ensure that we get the English text. Now we want to make use of DBpedia's multilingualism and replace the static language filter by a mapping that can easily be changed. In the HTML area of the editor, position the cursor in an empty line and select Mapping from the Add: Config Element drop-down menu on the left side.
As Id enter language and as (default) Value for this mapping enter en. Click OK to complete the template instance creation process.
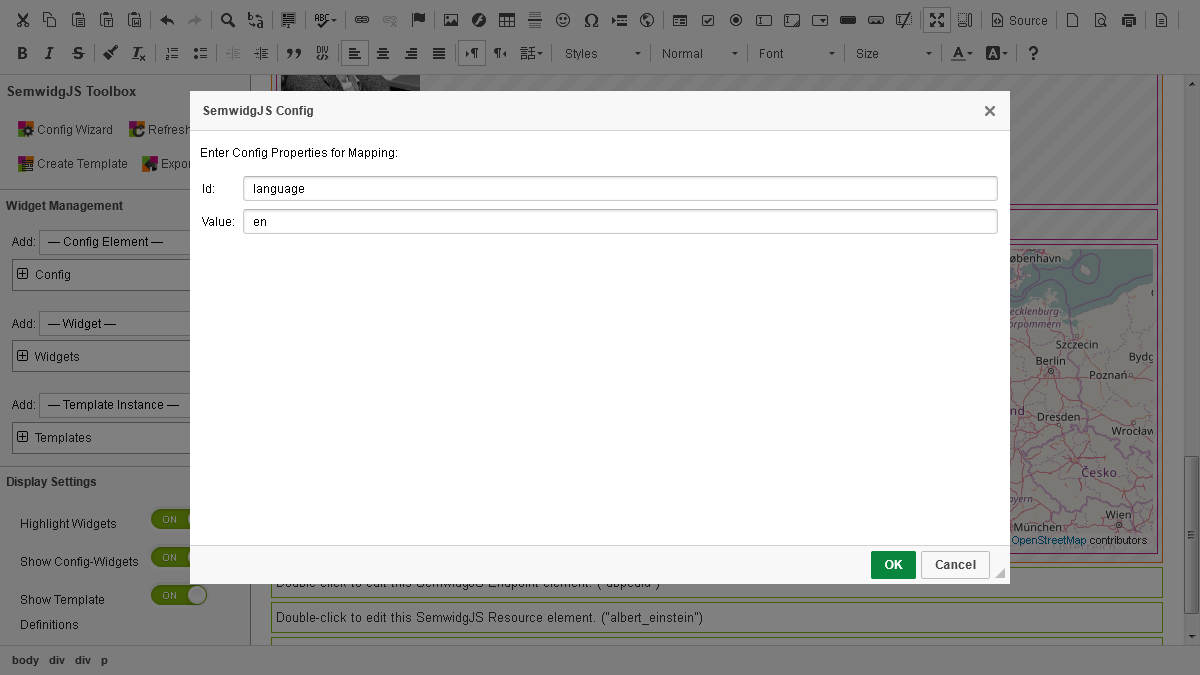
The configuration element for the new mapping should appear in the HTML area.
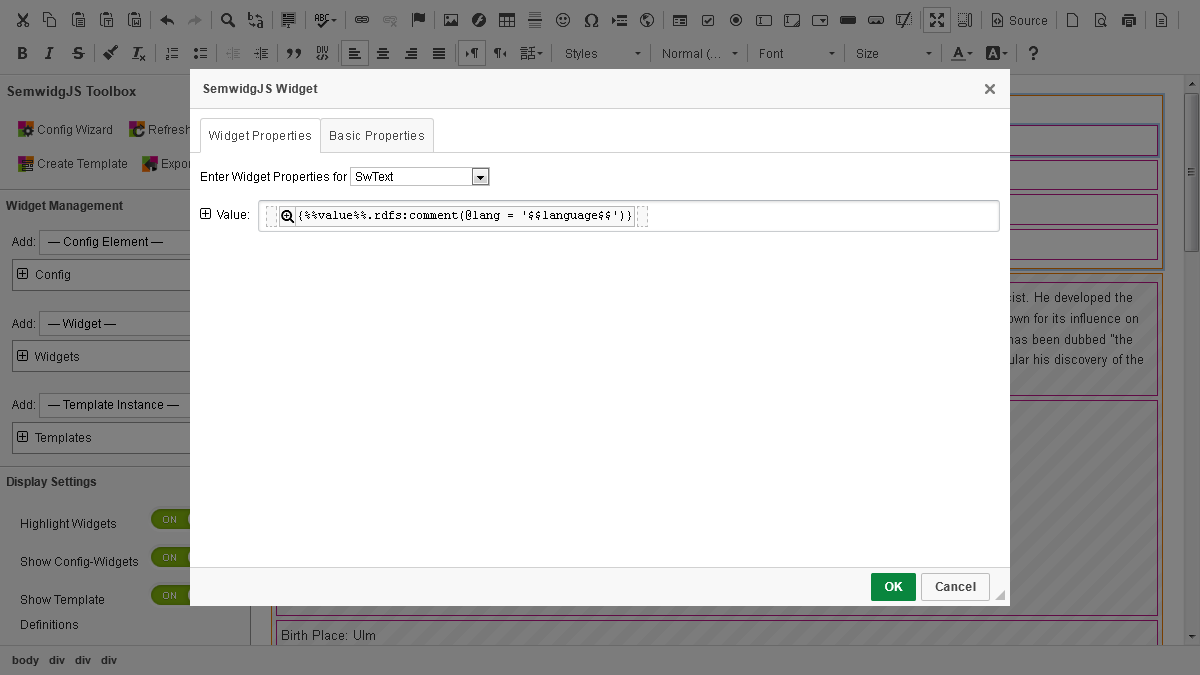
In the template definition, double-click on the widget responsible for displaying the comment text to open the corresponding widget configuration dialog.
Replace the string en by the id of the mapping enclosed in double $ signs ($$language$$). Mappings work similar to template parameters, except they are enclosed in double $ signs instead of double % signs and they are assigned globaly. Click OK to complete the configuration process. Since the default value of the mapping is equal to the previous value, everything should look the same.
12. Creating a select box and binding it to a mapping
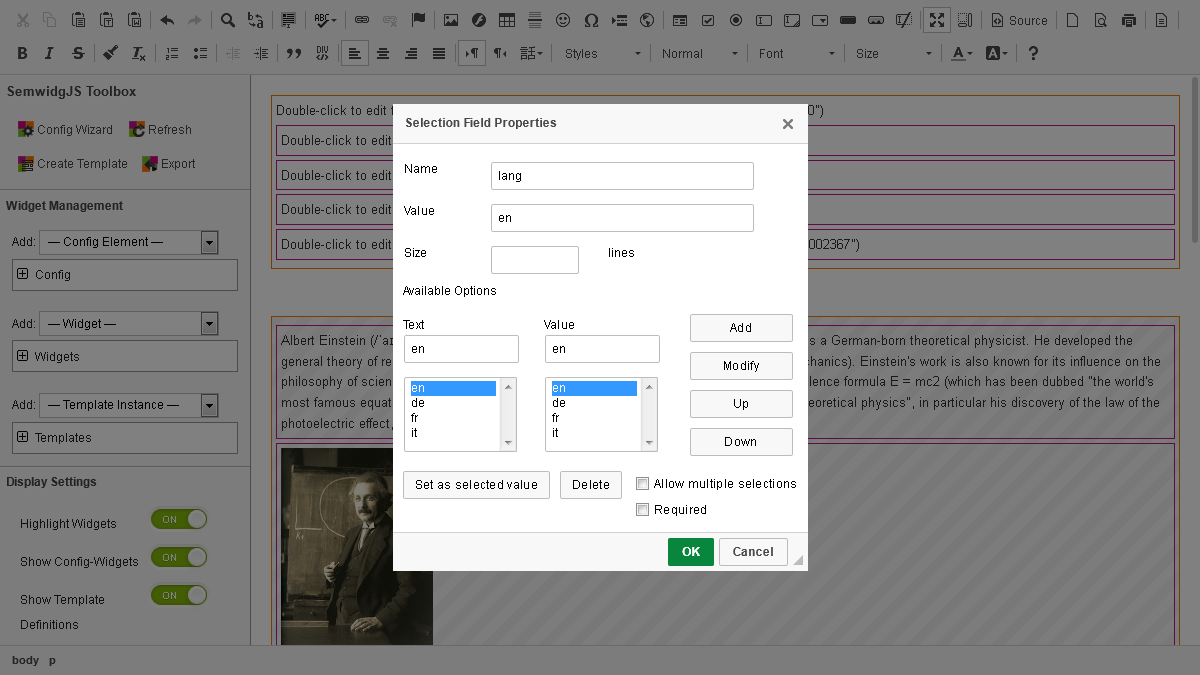
After creating the mapping, we will now add a common HTML select box that will allow the users to interactively change the language of the displayed comment text. Place the cursor in an empty line above the first template instance and click on the Selection Field button in the upper toolbar.

Enter a Name (lang), a pre-selected Value (en), and some Available Options. Possible text/values pairs are en/en, de/de, fr/fr, it/it. These options will later allow the users to switch the language of the comment text between English, German, French, and Italian. Click OK to complete the creation process.
The select box should now be created. Unfortunately, it is not usable in the editor. The website must first be saved or exported. But before that, we need to connect the select box with the language mapping. This requires a little JavaScript code that can be entered in the source mode of the editor. Click on the Source button in the upper toolbar to switch the editor mode.
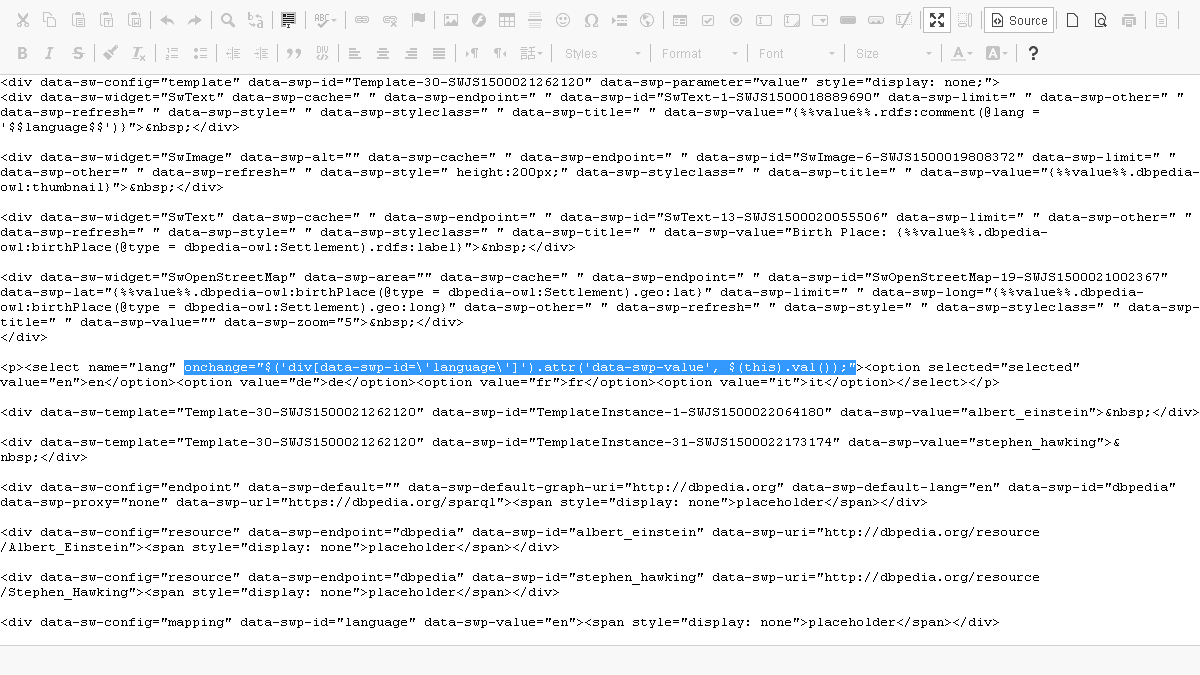
We want to tell the select box that everytime the selected item changes, the value of this item should be passed to the mapping element. Since jQuery is already loaded, because it is required bei SemwidgJS, we will use it to select the mapping and change its value. Locate the code of the select box and add an onchange handler. In the handler let jQuery search for the mapping element and change its attribute value by the current value of the select box. The complete added code should be: onchange="$('div[data-swp-id=\'language\']').attr('data-swp-value', $(this).val());". Switch back to the WYSIWYG mode of the editor by clicking again on the Source button in the upper toolbar.
13. Exporting the website
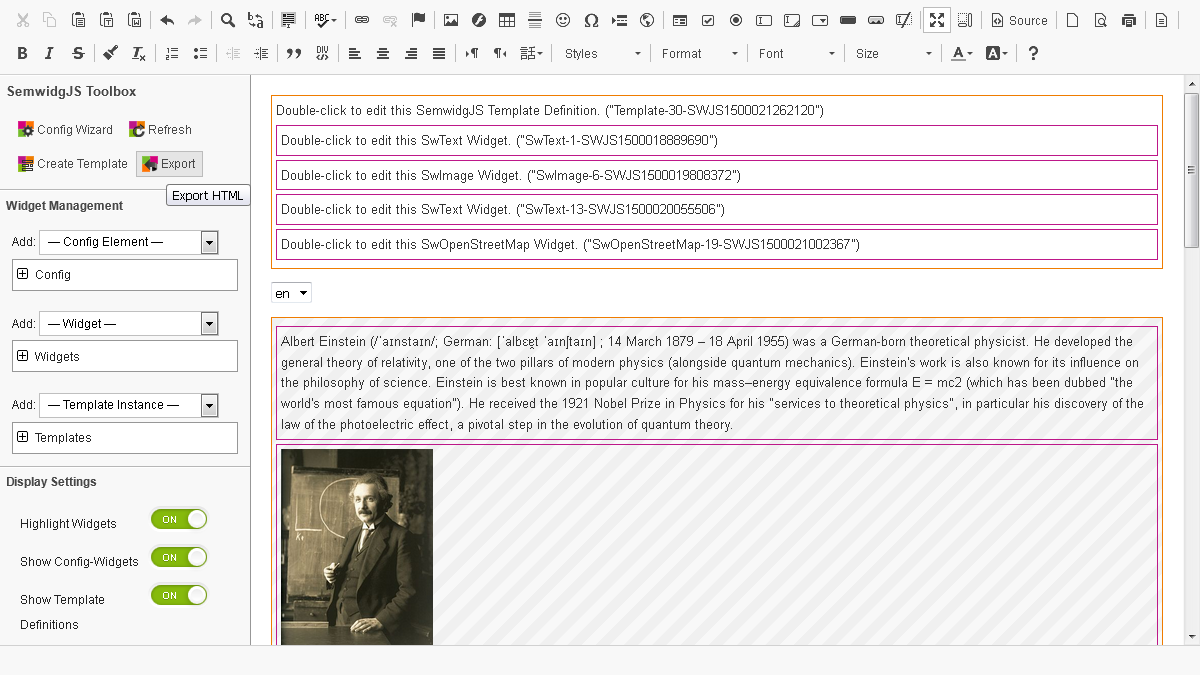
To use the code we created in the last steps, we have to export the site. Click on the Export button in the SemwidgJS Toolbox on the left side.
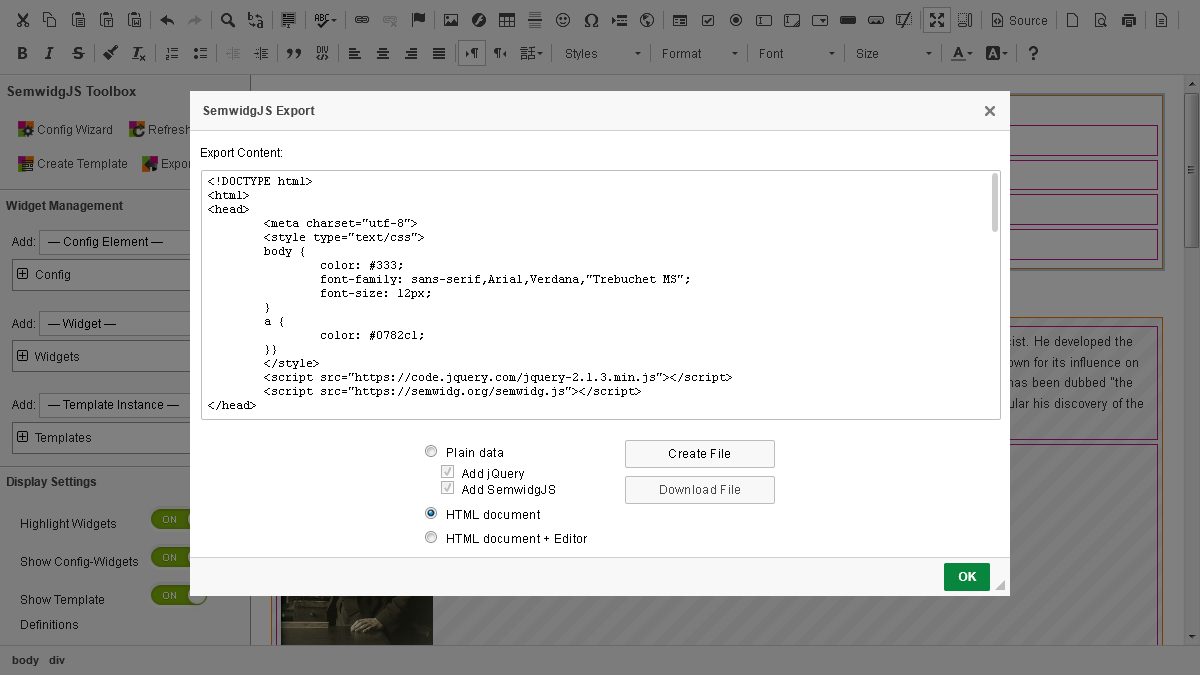
We can choose between different modes. In the Plain data mode only the body of the created content is exported. When the code should be embedded into a existing website, this is the right mode. The HTML document mode exports a valid HTML document that can directly be vied in a browser. The HTML document + Editor mode additionally adds the code for running the editor to the HTML document. This mode can be used to make a backup of the current state of the website that can be edited with the editor in the future. Choose HTML document and click the Create File button. Subsequently, click the Download File button.
Open the exported file with your web browser. You should be able to switch the language via the select box. The exported version of this example can also be viewed at the end of this page.